Earth-shattering or incremental. However you view Apple’s latest iPhone 16 family, there’s no denying the fact that they remain some of the most capable and sought-after phones on the market.
Hardware additions like Camera Control and software improvements brought on by iOS 18 make today’s iPhone experience more customisable and feature-packed than ever before. So much so, in fact, that if you’re not aware of every new addition, there’s a chance you might miss something.
So, whether you’ve opted for the smaller iPhone 16 or iPhone 16 Pro, or the sizeable iPhone 16 Plus or iPhone 16 Pro Max, these 16 tips and tricks are designed to help you get the most out of your new Apple phone.
Protecting battery health
Battery life was one of the big sticking points with the iPhone 15 series. Not so much how long they’d last on a single charge, but how quickly battery health seemed to deteriorate over time.
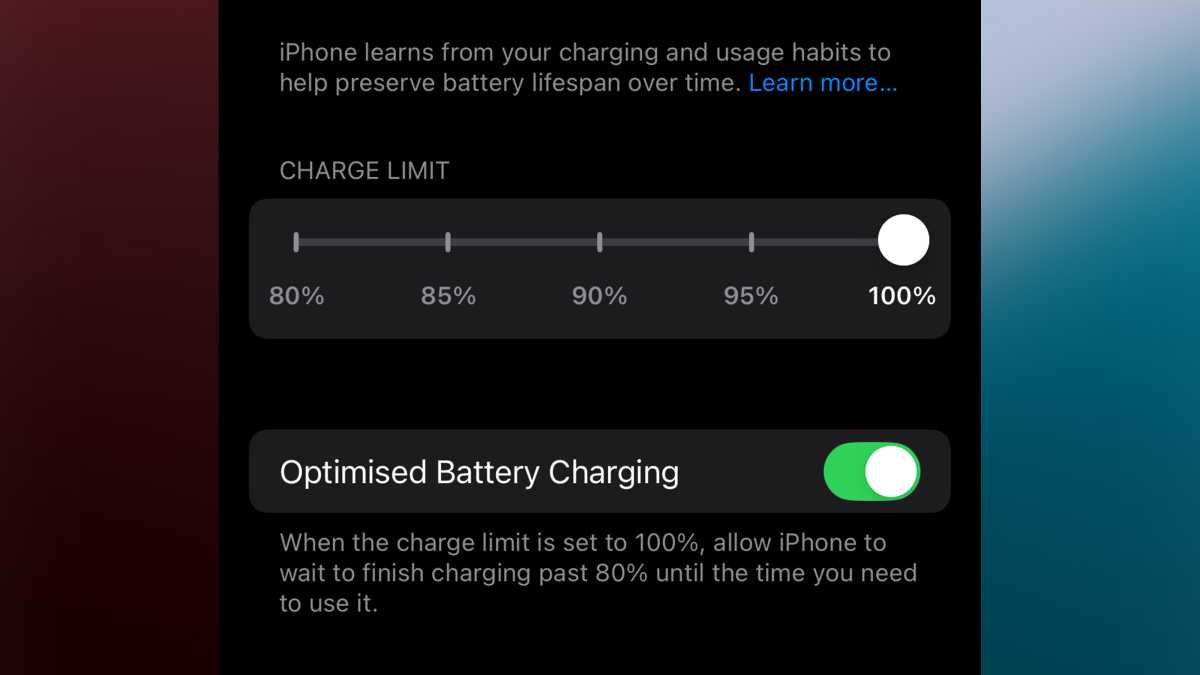
Apple did add a feature to limit charging to 80% capacity to better maintain battery health (lithium-ion batteries like those inside your iPhone are happiest when they remain charged between 20% and 80%), but with the iPhone 16 series, you have a lot more control over this functionality.
Foundry | Alex Walker-Todd
HOW? Open the Settings app and tap on Battery. In the Battery menu, tap on Charging and you’ll then be presented with a slider, divided into 5% increments from 80% to 100%. Move the slider to the peak capacity of your choosing and your iPhone’s battery will never charge past that set percentage. You’re essentially sacrificing battery life per charge for long-lasting battery life over time. Ideal if you tend to keep hold of the same iPhone for two years or more.
Note: The Charging menu also includes a toggle for ‘Optimised battery charging’ which will learn your usage patterns and hold your phone’s charge at 80% while you’re sleeping, only filling the phone to 100% just before you wake up (this is less damaging that holding the charge at 100% all the time).
Background app refresh
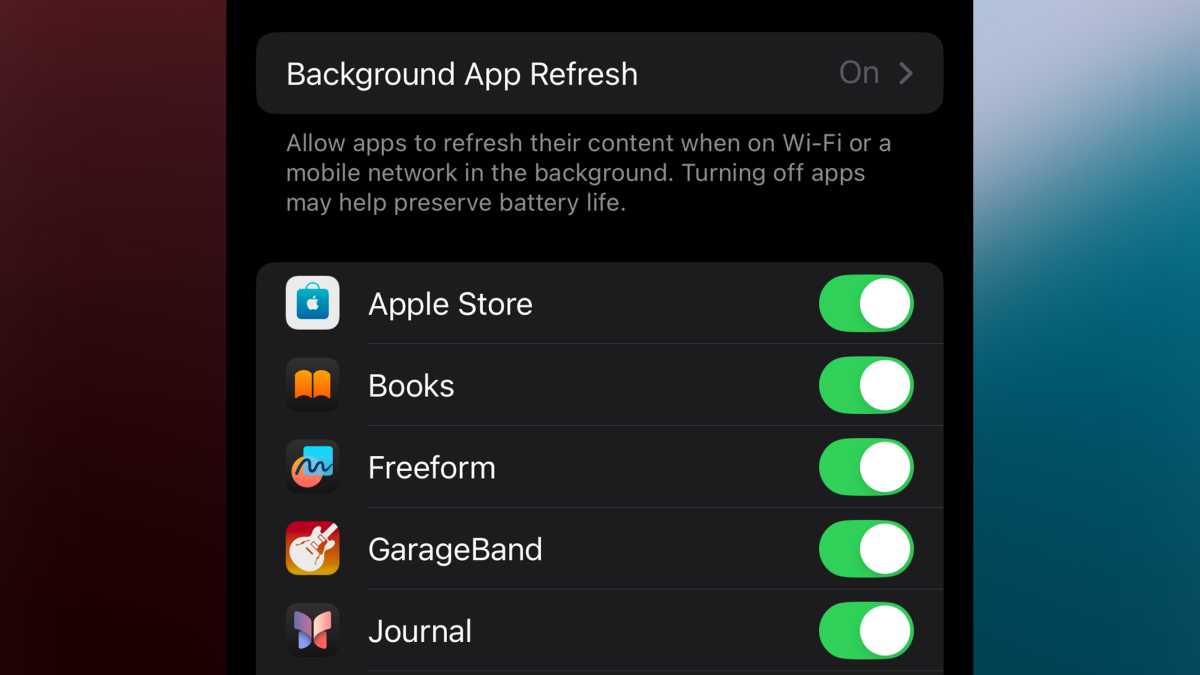
Another power setting worth toying with is Background App Refresh. A lot of apps need to perform actions in the background in order to function properly, even when you’re using another app or your phone’s locked and in your pocket.
For example, Maps needs to keep tabs on your whereabouts while following a route and WhatsApp needs to check for new messages and download media. All of these background tasks require additional power.
Foundry | Alex Walker-Todd
Although plenty of the apps on your phone may perform background tasks, not every app necessarily needs to. You’ll likely have a clear idea of which you really need to stay active and which can be kept dormant until you actually open them. Thankfully, the Background App Refresh menu lets you toggle which apps can perform background activities and which can’t.
HOW? Open the Settings app, tap on General and scroll down to Background App Refresh. Tap to open and then simply toggle which apps you want to allow or disallow the ability to refresh in the background. The more you disable, the more power you’ll save.
Lock screen lockdown
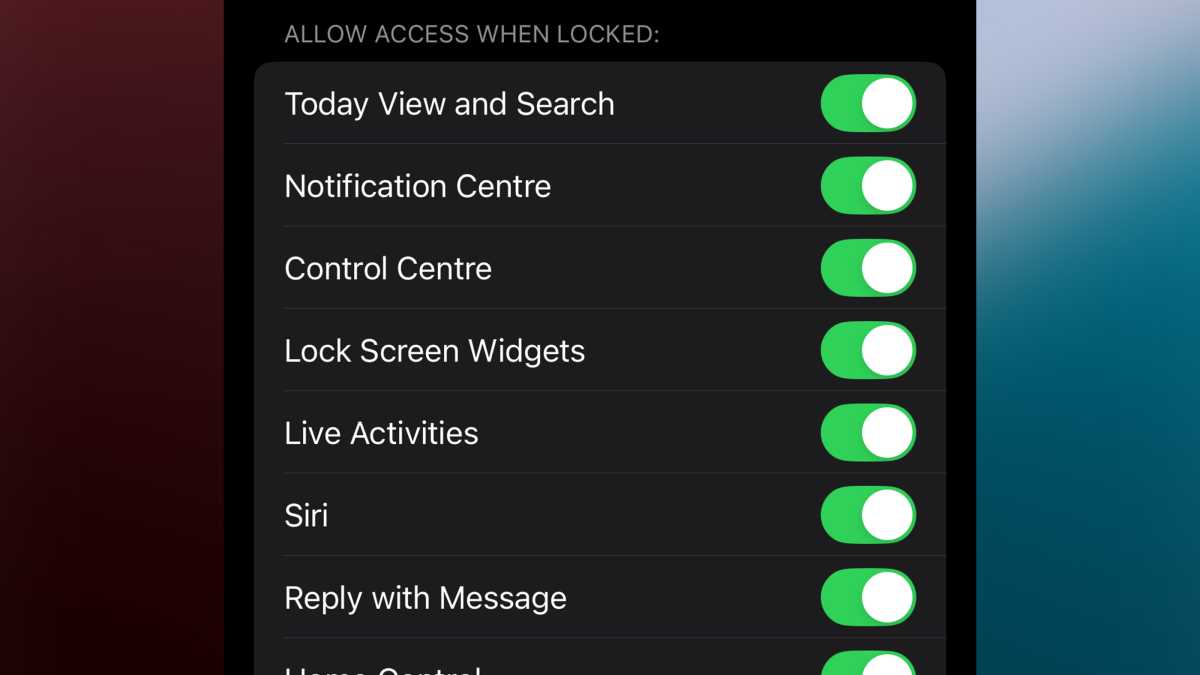
Even when your phone is locked, there are still a fair few features that remain accessible. Control Centre and Notification Centre are the obvious ones, but smart home controls, Live Activities and much more are shown on the display.
Whether you want to keep your lock screen clear to better enjoy that all-important photo of your cute cat or you’re worried about the security of privacy risks and unaltered iPhone lock screen poses, there’s a way to pair back just how unlocked your lock screen feels.
Foundry | Alex Walker-Todd
HOW? Once again, head to the Settings app and open up the Face ID & Passcode page, then enter your passcode and then, on the subsequent screen, scroll down to the Allow Access When Locked section. Here, you’ll find all the features that can be accessed from your iPhone’s lock screen and all you need do is toggle on or off the features you do or don’t want available.
Lock screen shortcut controls
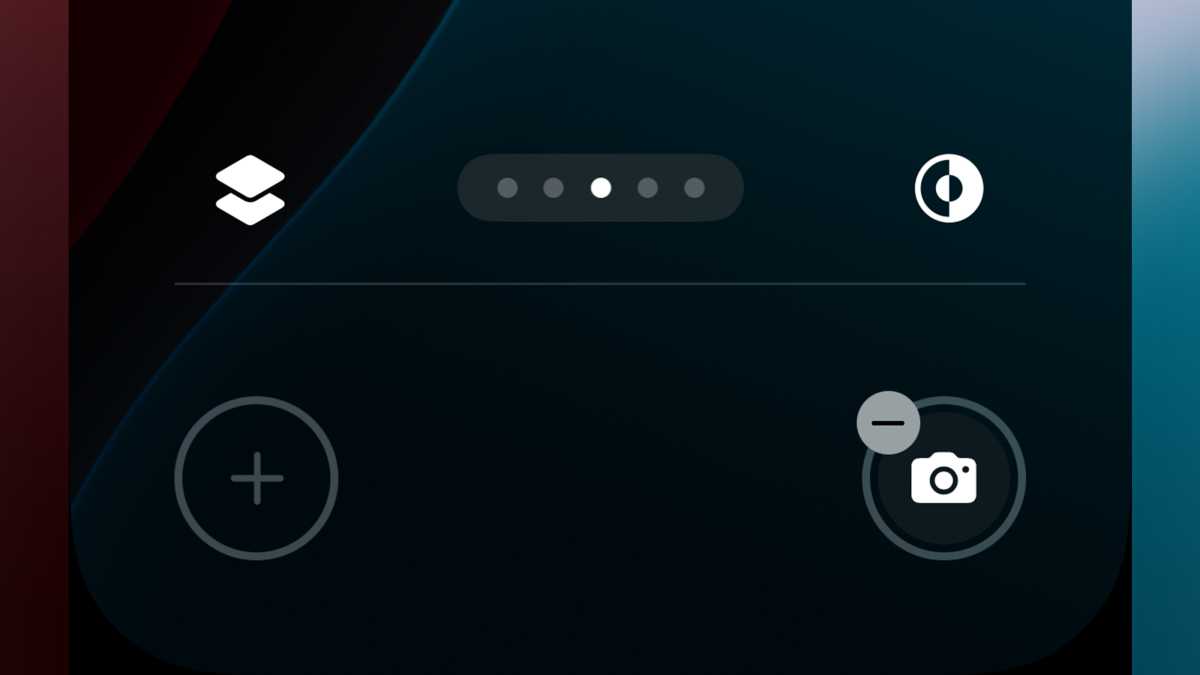
For a while now, iOS has offered two shortcuts in the bottom corners of the lock screen: the flashlight and the camera. But wouldn’t it be nice to change up those lock screen shortcuts for some other feature you turn to on the regular? Thankfully, you can.
Foundry | Alex Walker-Todd
HOW? Make sure your phone is unlocked but that you’re still on the lock screen. Next, long-press in any blank area to access the customisation menu. Tap the Customise button at the bottom of the screen and then tap the Lock Screen option on the left.
You’ll then see that each existing shortcut (the torch and camera by default) has a minus (-) symbol in the corner. Tap the existing shortcut to remove it and then tap the plus (+) icon that’s left in its wake to add a new shortcut.
You’ll then be presented with all of the available shortcut controls from first and third-party apps installed on your iPhone. There’s also a search field at the top to search for specific controls you might want. Just select the shortcut you want by tapping on it when you’re finished, tap the blue Done button in the top right of the screen.
You’ll be brought back to the top layer of the Lock Screen customisation menu; simply tap in the centre of your lock screen to exit back to your standard lock screen, complete with your newly-selected shortcut controls.
Customise your icons
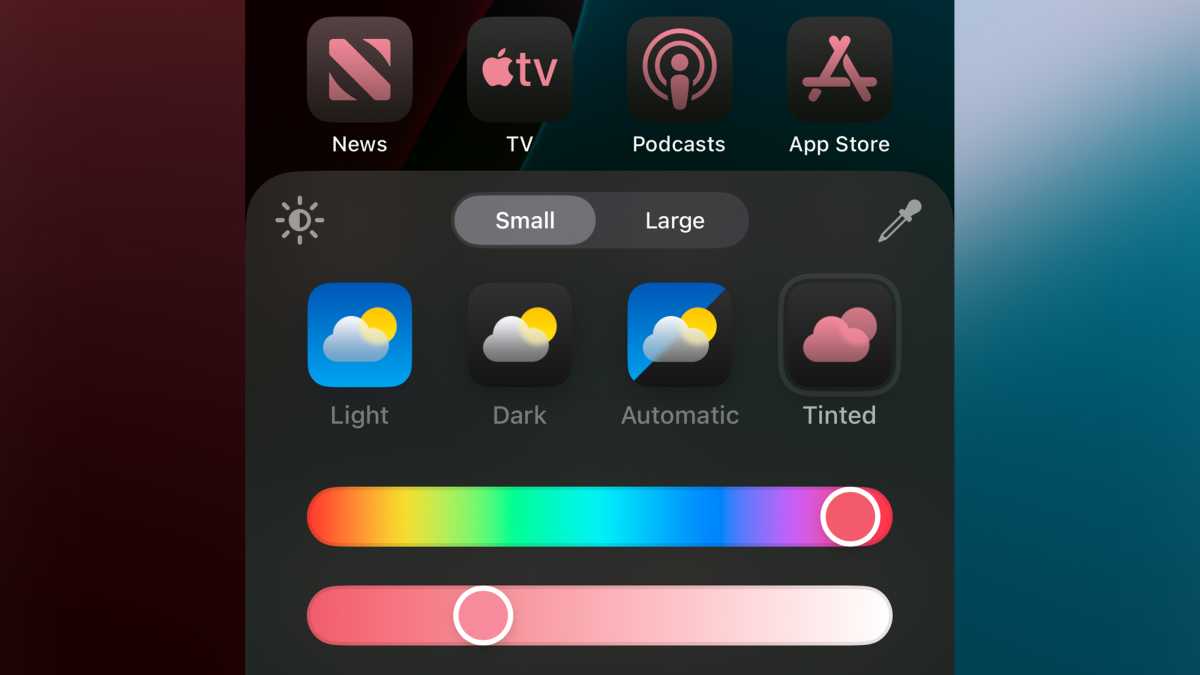
If it isn’t already obvious, iOS on the iPhone 16 gives you a ton more control over the look and feel of user experience than any previous release, and nowhere is that more prominent than with icon customisation. Not only can you place icons anywhere within your home screen grid, but you can also now change the look of all of your app icons with only a few taps.
Foundry | Alex Walker-Todd
HOW? Long-press on any blank space on your home screen, tap the Edit button which appears in the top-left of the screen and then tap customise on the subsequent pop-up menu. You’ll then see a card at the bottom, letting you set icon sizing (as well as enlarging app icons, ‘Large’ removes the text under apps and folders), whether they should be light or dark-themed, switch automatically or tinted. Tinted gives you the most control, letting you set the colour of every app icon.
You can also use the eye-dropper tool in the top right of the card to pull a colour from your current home screen wallpaper. Once you’ve tweaked your icons accordingly, just tap anywhere outside of the customisation card to exit back to your home screen, now with your newly-styled icons in tow.
Lock or hide apps
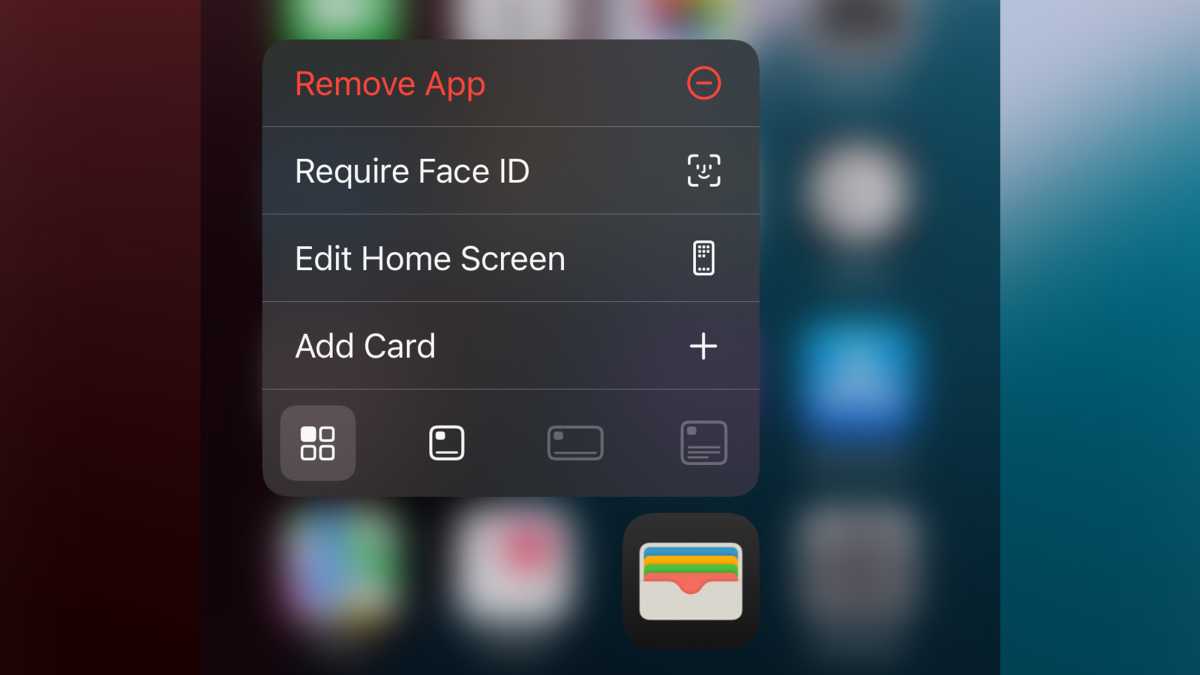
While you might be happy handing your phone around to family and friends, there’s a chance you might want to keep some sensitive apps locked or hidden away, while keeping the rest of your phone accessible. You can do both on the iPhone 16 series.
Foundry | Alex Walker-Todd
HOW? Long-press on an app on your home screen and you’ll see the option to Require Face ID on the resultant pop-up menu. Tapping this brings up a secondary menu, where you can choose between Require Face ID or Hide and Require Face ID.
While the former just prompts Face ID authentication any time you try and open the app, Hide and Require Face ID removes the app icon from your home screen and stores it in a folder called Hidden, at the bottom of your App Library (all the way to the right). Tapping on this Hidden folder prompts Face ID authentication, before making its contents visible and accessible.
Hide ads on Safari
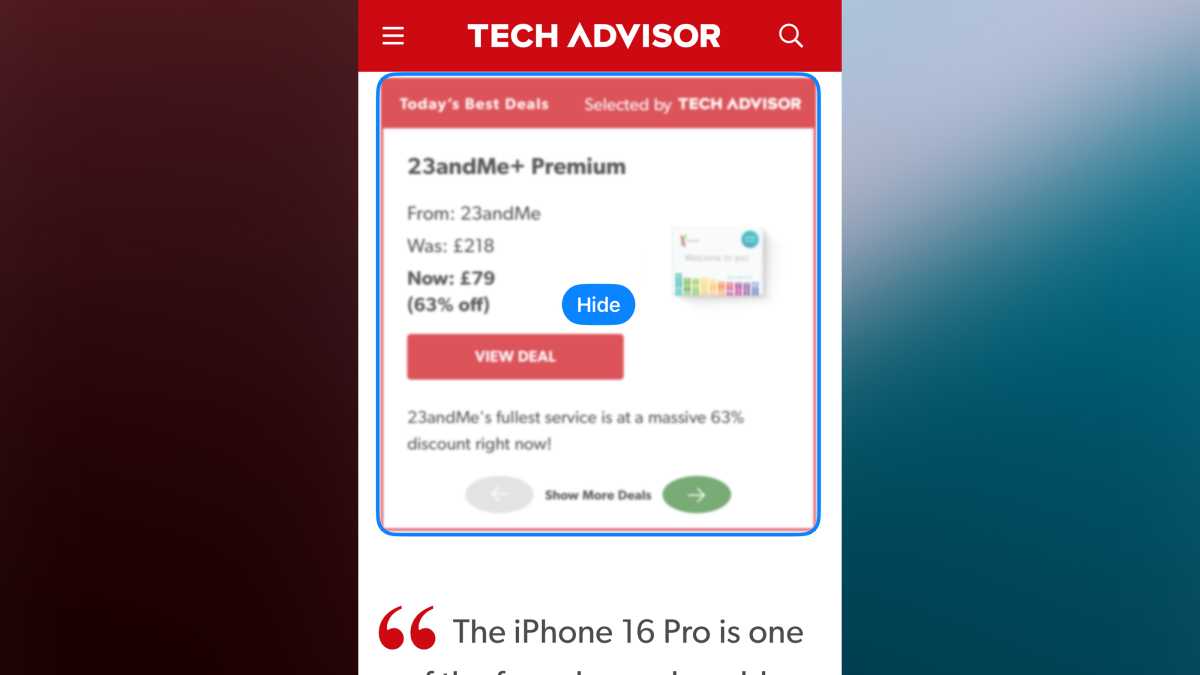
If you like the idea of being able to hide apps, just wait until you hear about Safari’s Distraction Control. While great for hiding ads, Distraction Control actually lets you hide any UI element on a web page that doesn’t appeal.
Better yet, Safari remembers which elements you’ve hidden, so if you navigate back to a particular website in a separate session or reload the page, those elements remain hidden.
Foundry | Alex Walker-Todd
HOW? Open Safari and navigate to a page with ads or other elements you want to hide. Tap on the Distraction Control icon on the left of the URL bar/search field and then tap Hide Distracting Items. Next drag your finger over the element you want to hide, release and then tap the selected element to remove it.
The element you’re hiding will animate into particles as if Thanos himself just snapped his fingers. Once you’ve hidden all the elements you want to, tap Done in the bottom-right. Now you can navigate our page ad-(or whatever your chosen UI elements were) free.
You can also unhide everything you’ve hidden on a page by tapping the Distraction Control icon again and selecting Show Hidden Items.
Note: Some hidden dynamic elements that naturally refresh regularly may reappear of their own volition.
Stealth Silent Mode
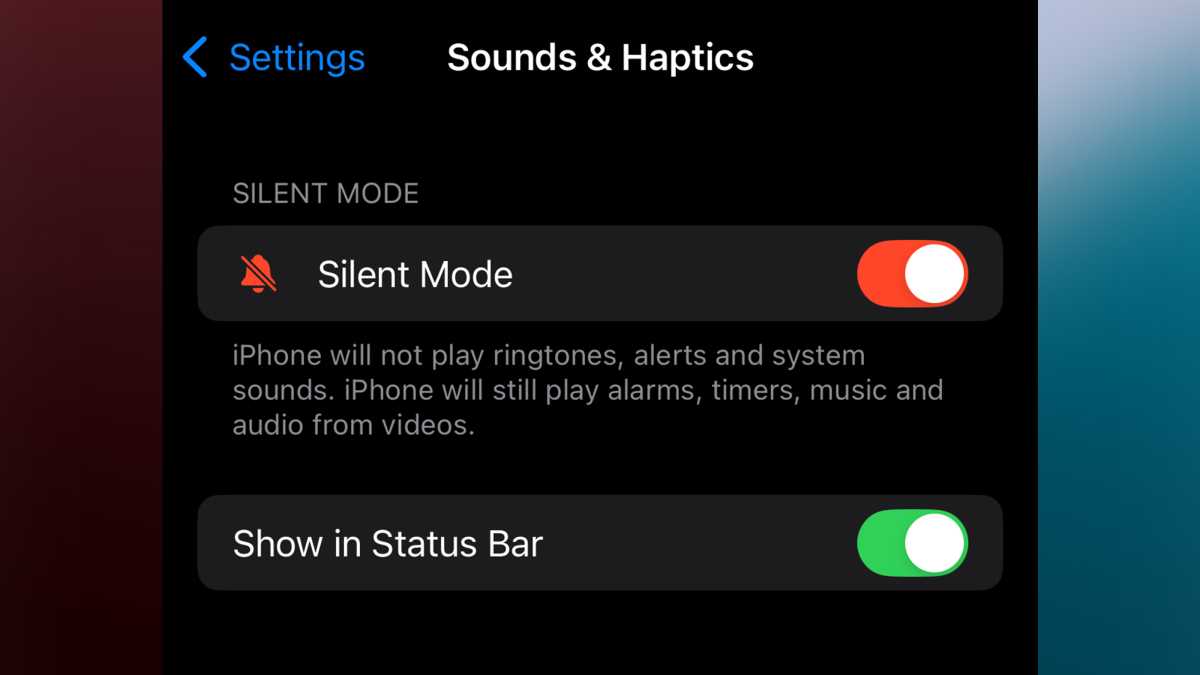
If, like many, your iPhone is chronically set to Silent, then you’ll be all-too-familiar with the struck-through bell icon that lives next to the clock in the top-left of your home and lock screen. If you mistake this little cluster of pixels for some other notifier from time to time, or you just don’t need to be reminded that your phone’s on silent because ‘of course it is’ then you’ll be pleased to learn, there’s now a way to hide it.
Foundry | Alex Walker-Todd
HOW? Open Settings and scroll down to Sound & Haptics. Tap to open it up and under the Silent Mode toggle, you’ll see a field called Show in Status Bar, which itself can be toggled off or on.
Customise the Action Button
This is something carried over from iPhone 15 Pro line, though it now benefits the entirety of the iPhone 16 line too.
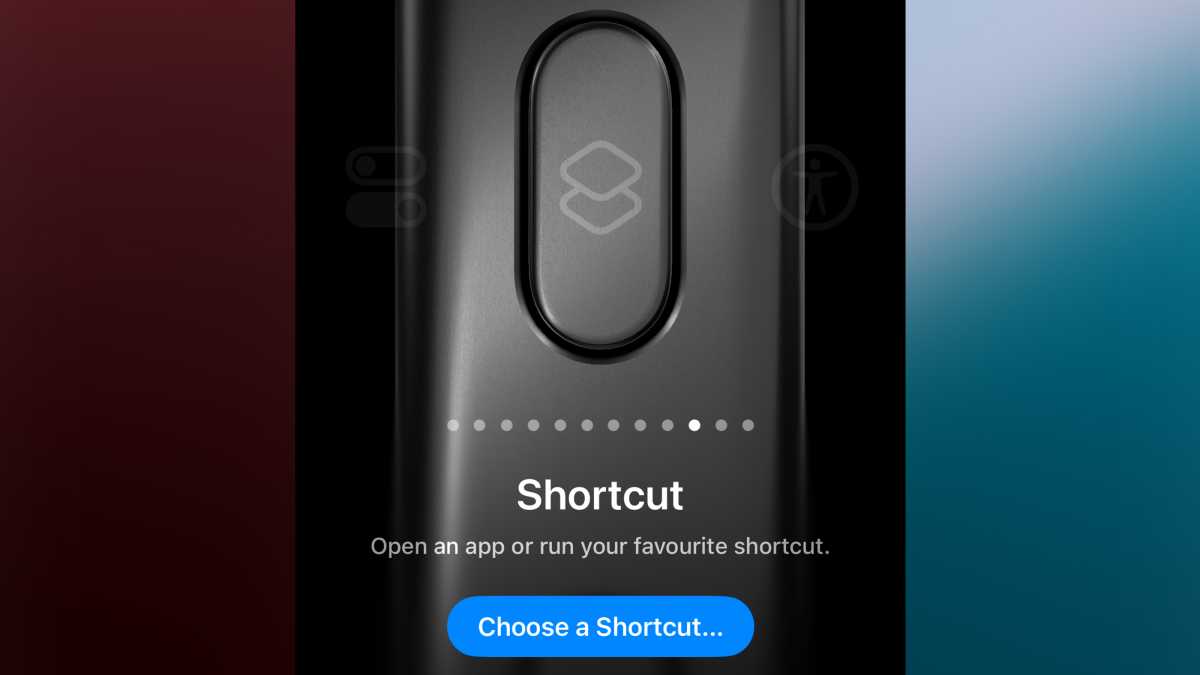
The Action button can be used for so much more than just flipping Silent mode on or off. Since the hardware’s introduction in 2023. the iPhone community has worked hard to create all sorts of fun and useful new ways to put the Action Button to work, primarily through its support for Apple’s Shortcuts app.
Foundry | Alex Walker-Todd
HOW? Open Settings and scroll down to Action Button, and tap to open. You’ll then see the Action Button’s flashy 3D interface, where you can swipe through the various preset options Apple has already made – like torch or translate, but you also have the option to specify a control, like you’d find in Control Centre or a Shortcut.
If you opt for the latter, as an example, next tap the Choose a Shortcut button and then create or select a shortcut as desired.
Note: Check out the ‘My Super Action Button’ Shortcut recipe we found (via Reddit), it integrates a ton of functionality, all from a simple long-press of the Action Button.
Customise Control Centre
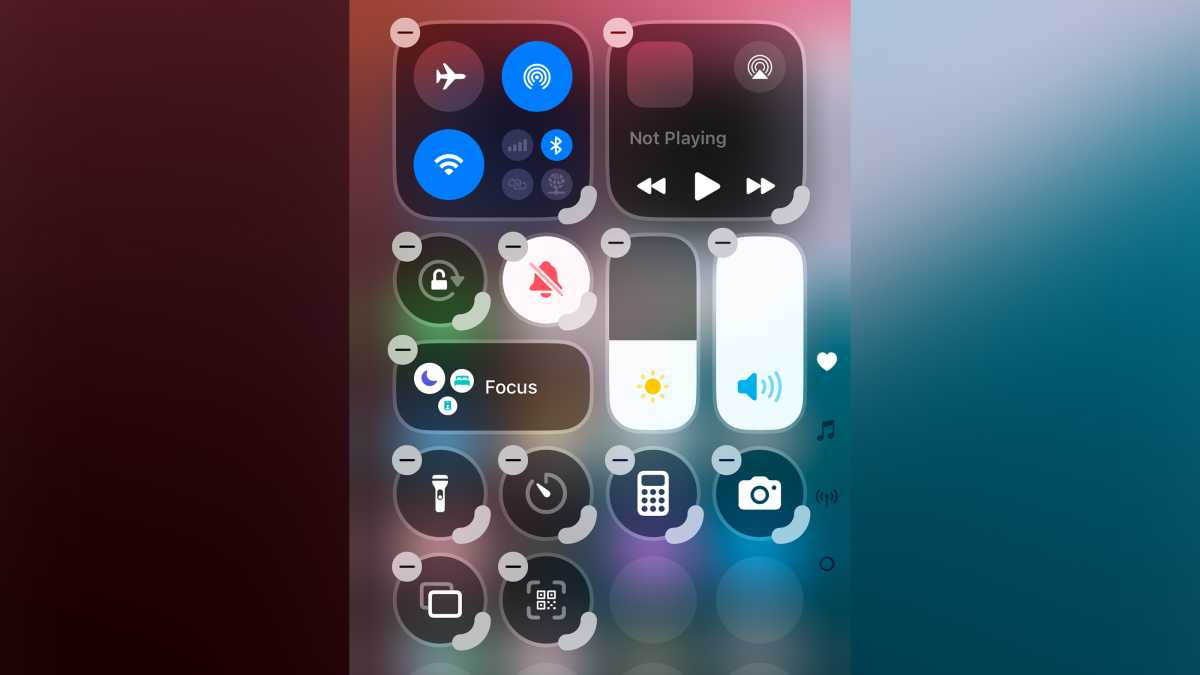
Just as you can tweak the look of your home screen, the newly revamped Control Centre offers a lot more… control over its look and feel now too. You can resize widgets (from 1×1 to 1×2 or 2×2) and even create full-screen widgets, which you can swipe up and down between.
Foundry | Alex Walker-Todd
HOW? Simply swipe down from the top-right corner of the screen to access Control Centre, then either tap the plus (+) icon in the top-left or long-press on any blank area to access the edit menu.
From here you can move controls around anywhere within the on-screen grid, resize any controls with a grab handle in the bottom-right of their icon, or add a new control altogether by tapping the Add a Control button at the bottom of the screen and searching for a control you’d like access to. When done, just tap in any blank area of Control Centre to exit the edit menu.
Camera Control-cum-Action Button
The Action Button isn’t the only shiny new hardware the entirety of the iPhone 16 series benefits from. Camera Control adds pressure, swipe and press-based physical interaction to the shooting experience on the latest iPhones.
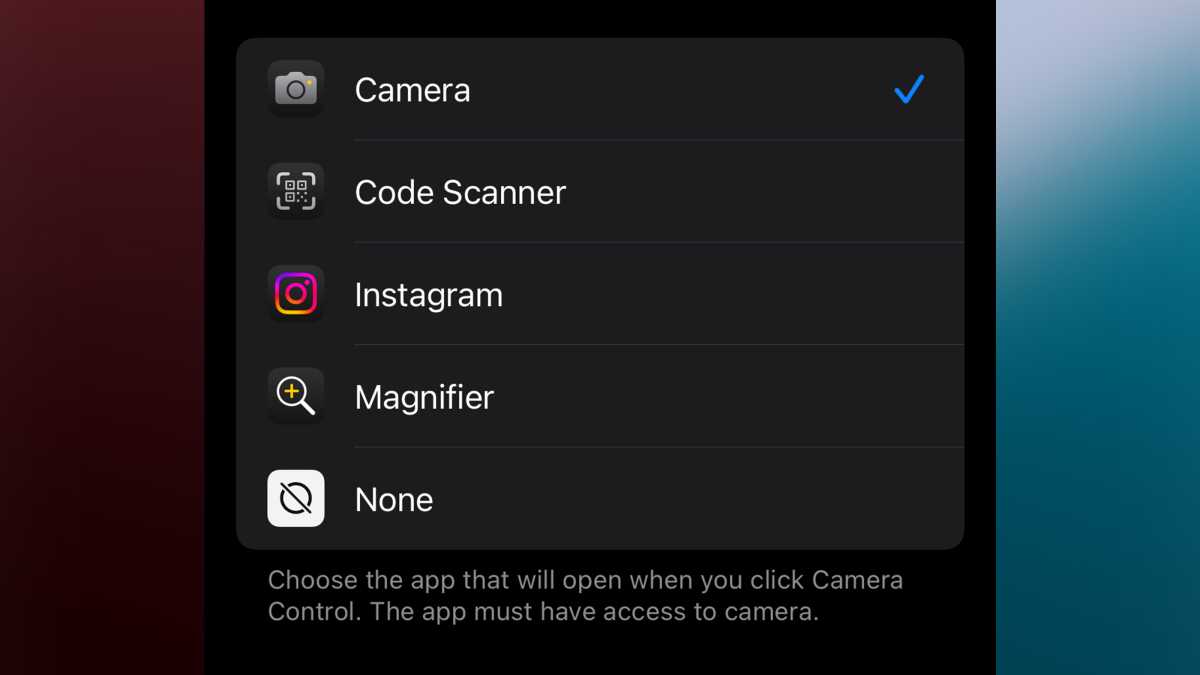
By default, a full-press quick-launches the iPhone’s native Camera app, but you can actually choose any app with native camera support, if you’d rather jump straight into the QR code scanner or Instagram’s camera experience, for example.
Foundry | Alex Walker-Todd
HOW? Open Settings, open the Camera menu and under System Settings at the top, you’ll see the option for Camera Control. From here, you’ll see on the lower half of the screen, all the apps that use your iPhone’s camera that can be set to quick-launch when you full-press the Camera Control button in place of the native Camera app.
Use the force
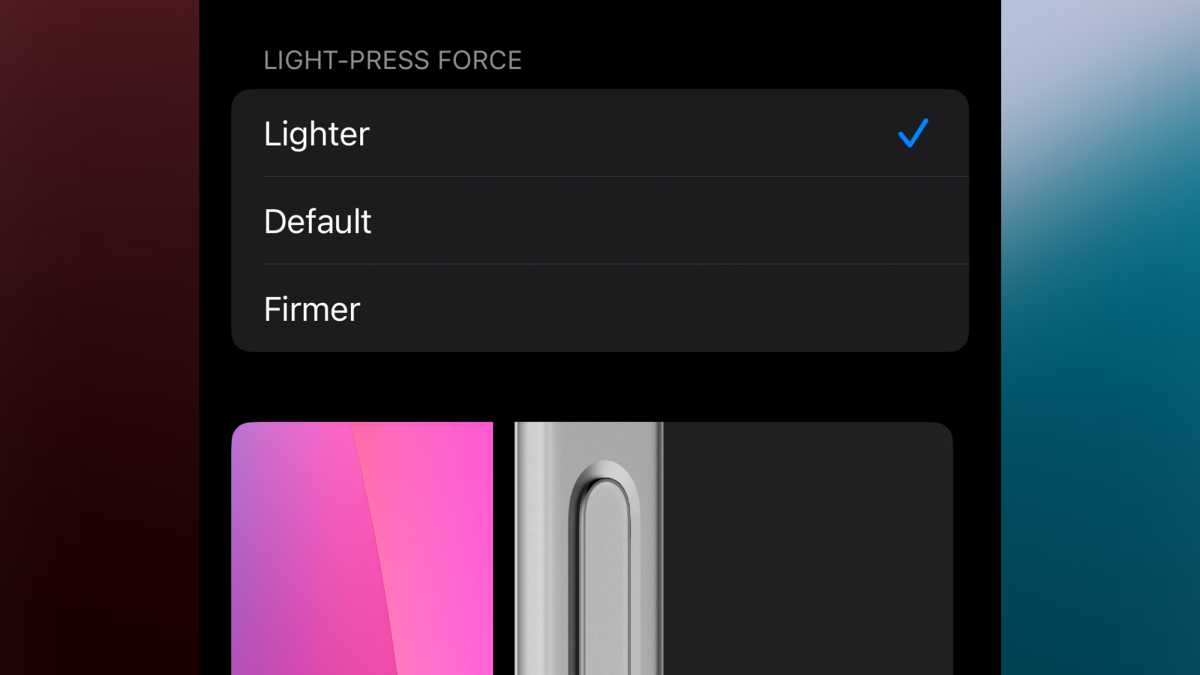
As convenient as the new Camera Control tries to be, time and again users have reported how difficult it can be to actually press it with enough force to grab a snap or change a setting, without requiring so much force that their iPhone starts to shake in their hands, potentially ruining the shot they’re trying to capture.
Luckily, there’s an option to alter the default pressure required by Camera Control, making it much easier to use.
Foundry | Alex Walker-Todd
HOW? Open Settings, head to Accessibility, then open up the subsequent Camera Control menu. Here, you can alter Light-Press Force, with the options of Lighter, Default and Firmer. We’d recommend Lighter, for ease of use.
Full-resolution ultrawide
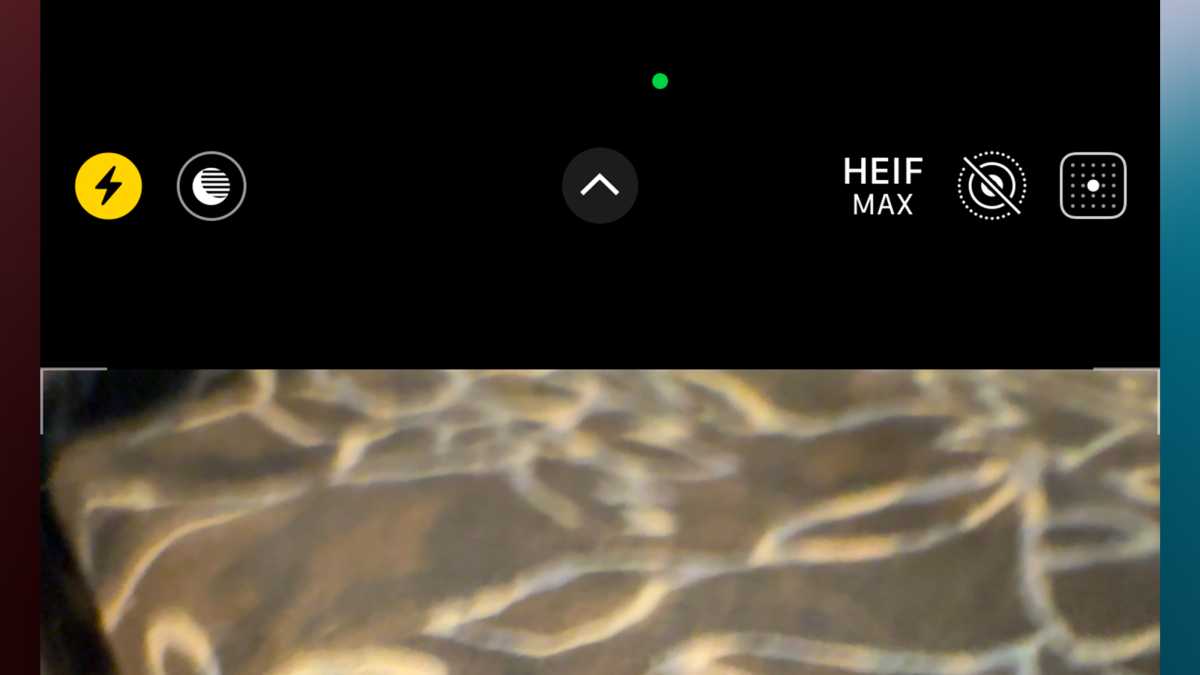
Not only has Apple unified the telephoto sensors across the iPhone 16 Pro and 16 Pro Max, but it’s also upgraded the ultrawide to a new 48Mp sensor, however, the phone still captures ultrawide shots at 12Mp by default.
Foundry | Alex Walker-Todd
HOW? To capture higher-detail ultra-wide photos at the sensor’s native 48MP resolution, open the Settings menu and head to the Camera sub-menu. Look for and tap on Formats before toggling on ProRAW & Resolution Control.
Then, within the Pro Default option that appears underneath, tap on it and select HEIF Max (up to 48 MP).
Now, just head back to the Camera app and whichever lens you shoot with – including the ultra-wide – you’ll now be able to tap the new HEIF Max icon in the top-right of the viewfinder, to enable full-resolution capture.
Note: As you might expect, shooting at a high resolution makes the files a lot larger than the 12Mp defaults, so keep that in mind, relative to the amount of storage you have available on your iPhone.
“Fixing” the Photos app
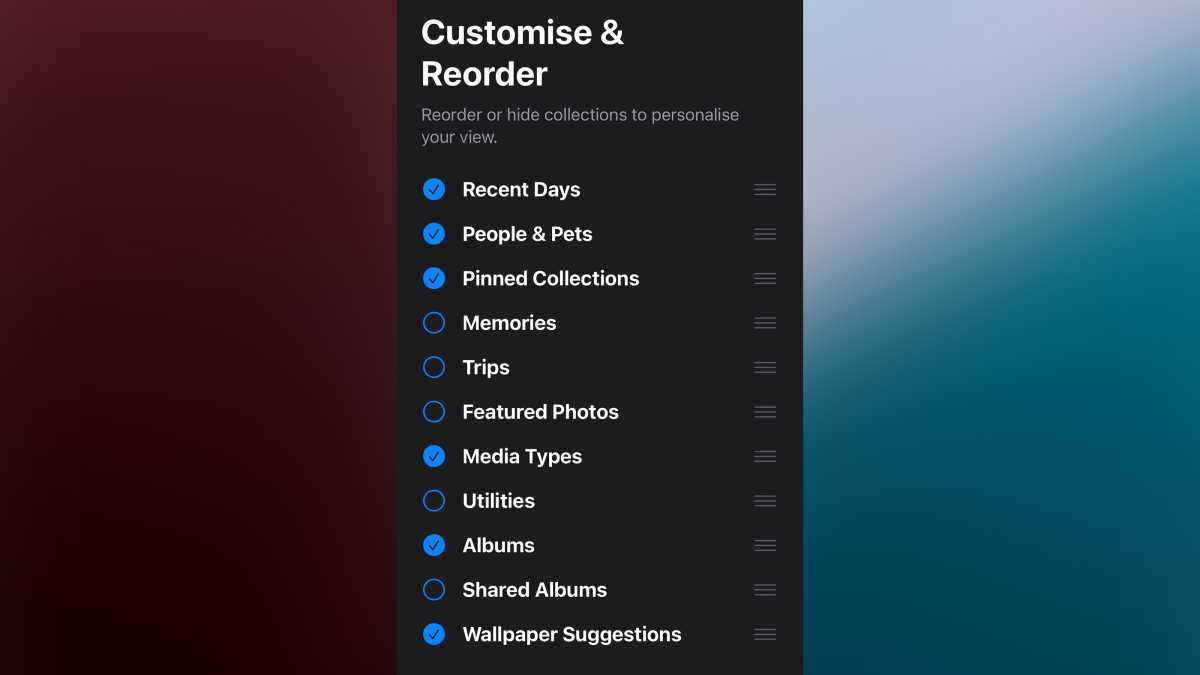
iOS 18’s native Photos app looks quite different to the version that preceded it. Whether you don’t like the changes or just want to tinker with the layout of the Gallery to suit your tastes, there are tools to tweak it all.
Foundry | Alex Walker-Todd
HOW? Open the native Photos app and scroll to the bottom, where you’ll find a Customise & Reorder button. Tap this and you can then tick or untick sections you do or don’t want to appear in the Photo interface (like Memories, Trips, Albums etc.), along with drag controls along the right side to reorder where each section will appear in the Photos app.
When you’re done, tap the ‘x’ icon in the top right to return to the main Photos app interface, which should now look and feel much more in keeping with your tastes.
All Photos Data
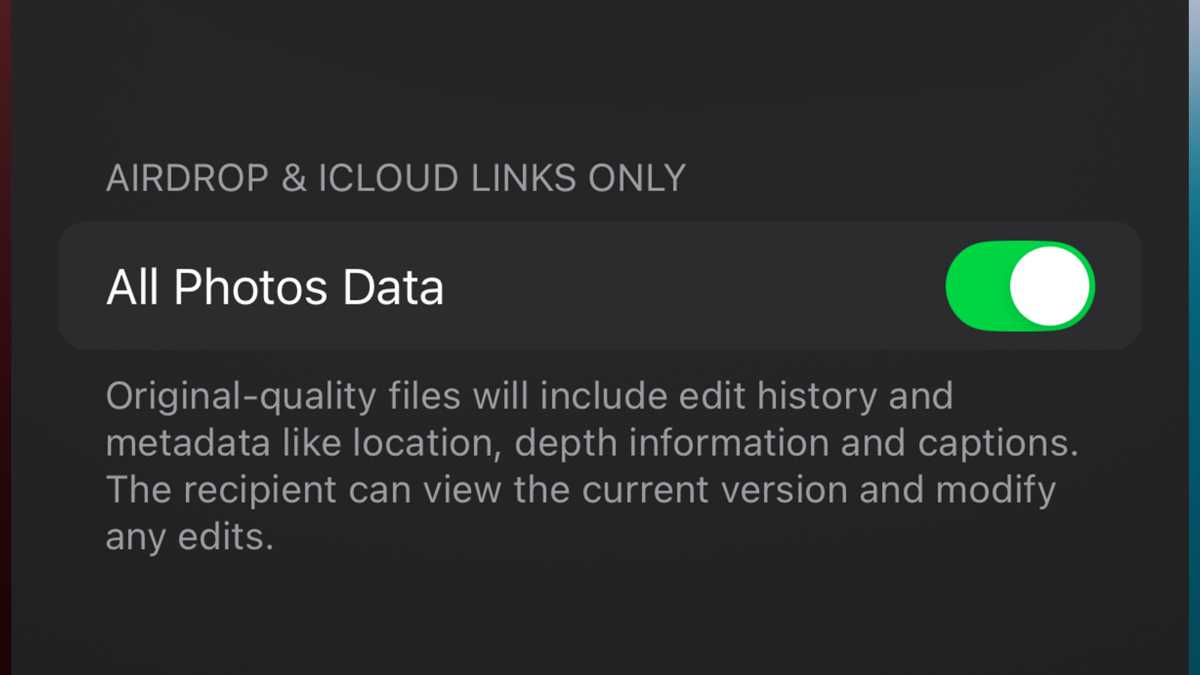
Whether you added a particular Photographic Style to a killer portrait shot or slowed a 4K 120fps video clip down to 25% of its original speed, your iPhone lets you choose the version you send. Either a hard-baked version of the clip you edited, or a non-destructive version that the recipient can then reverse the alterations made to it if they so choose.
This is great for those times when you’re collaborating on a creative project together, the recipient wants to try their hand at editing a photo or video you’ve captured, or you just want to send a certain style of photo or speed of video without the recipient being able to unpick your edits.
Foundry | Alex Walker-Todd
HOW? Take a shot and make edits as desired at or after capture. Within the Photos app (or accessing your media from the gallery shortcut in the bottom-left of the Camera app’s viewfinder), tap the share button (a box with an arrow pointing out of the top of it), in the bottom-left of the screen.
Select all the media you want to share and then tap the Options button near the top of the screen. Near the bottom on the subsequent Options screen, under AirDrop & iCloud Links Only, toggle All Photos Data on. Then tap Done in the top-right. Finally, share your image via AirDrop or an iCloud Link.
Note: iCloud links only last for 30 days. How much data you can send may be limited by your service carrier. The Options menu also lets you toggle whether your media is sent with location data attached or not.
Write now, Send Later
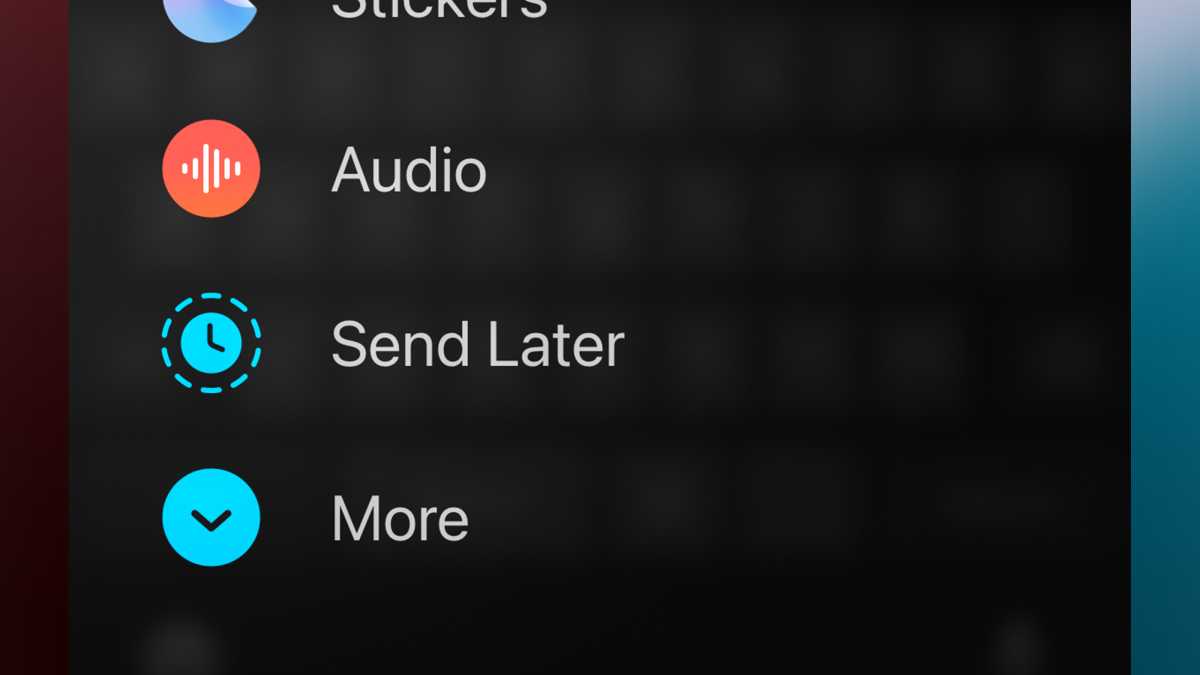
One smart trick exclusive to iMessage users (sorry, green bubbles) is the addition of scheduled messaging, called Send Later. The feature lets you compose a message to a contact as usual, but then schedule the date and time it’ll be sent; ideal for those worried about forgetting to wish someone a Happy Birthday, for example.
Foundry | Alex Walker-Todd
HOW? Open Messages and write a message to a contact you know uses iMessage (their number or contact name will appear in blue on the ‘to:’ field near the top of the message). Once written, tap the plus (+) icon, to the left of the text entry field, where you wrote your message.
On the subsequent menu, scroll down until you find the Send Later option. Tapping this will bring up familiar iOS date and time controls, set the date and time you want your message to send, and when you’re happy, tap the send button (upward blue arrow to the right of the text entry field).
Note: You can also long-press on your message after hitting send and edit or delete it before its scheduled send time, as desired.


