“Hoping someone has a solid recommendation on a plug-in or some way to do this correctly, without installing a bunch of questionable plug-ins on my Macbook. I want to record a Facetime video call, but capture audio from all parties. I tested this with Quicktime Player, which resulted in excellent video quality, but only audio from me, everyone elses audio on the call was not captured.”
-A post from Reddit
There are many reasons you might need to record your Mac screen – whether it is capturing Zoom or Teams calls for work, saving online courses for later, recording gameplay to share, or creating video tutorials and reviews. Whatever your purpose is, you need to learn some basic ways to record your Mac screen.
Tips for screen recording on a Mac
- Whether to use built-in tools or third-party apps for screen recording largely depends on whether you need to capture system audio on Mac.
- When recording the screen on a Mac (Mojave or later), it is best to start with the Screenshot app.
- Make sure the microphone is selected if you want to record your voiceover.
- It is advisable to tidy up your screen, close unnecessary apps (especially if Mac is lagging during recording), and turn off notifications.
- Check your internal drive to make sure there is enough free space for the recording.
- For privacy, security, and copyright reasons, Apple only allows sound recording via the microphone. This applies to screen recording on all Mac devices (MacBook Air/Pro, iMac, and Mac Mini/Pro/Studio) as well as iOS devices like iPhones and iPads.
- You can use the Screenshot app or QuickTime Player to record your Mac screen with background sound and, if needed, your own voice. However, for clear internal audio, third-party screen recorder software is required.
Recording screen video on a Mac using the Screenshot app (macOS Mojave and later)
Keyboard shortcut: Shift + Command + 5
The built-in Screenshot app was introduced in macOS Mojave (10.14, 2018). If your Mac (post-2012 models) runs Mojave or later, you can launch it instantly using the shortcut Shift + ⌘ + 5. A floating thumbnail preview will appear on the screen, and you can also find the app via Launchpad.
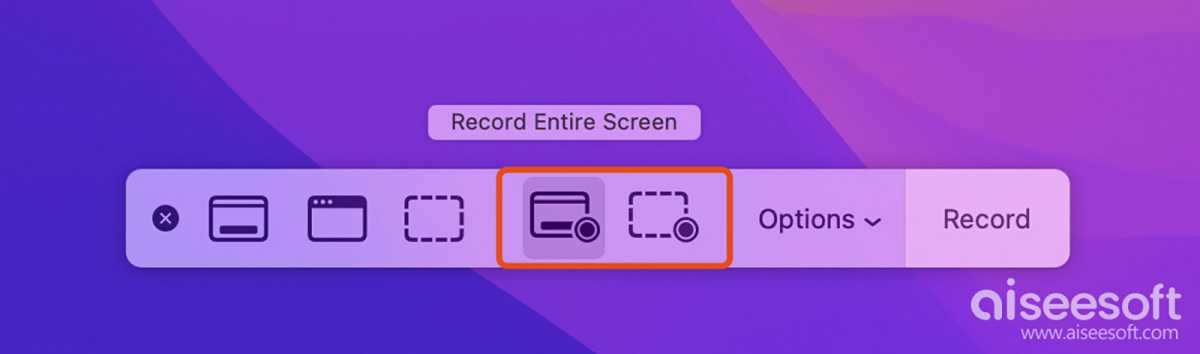
Screenshot offers two options for screen recording: ‘Record Entire Screen’ and ‘Record Selected Portion’. It also includes easy-to-use tools for taking screenshots. Before you start recording, click ‘Options’ in the toolbar to customize your recording settings.
Aiseesoft
To record your Mac screen with audio, select a microphone. For better sound quality, you can connect an external microphone. If you need a timed recording, set a recording timer, and choose where to save the file according to your preference. You can also enable Show Mouse Clicks to highlight clicks with a black circle around the pointer.
To start recording, click the Record button in the pop-up toolbar. If you select Record Entire Screen, your mouse pointer will turn into a camera icon – simply click to begin. If you are recording a portion of the Mac screen, adjust the selection by dragging the borders, then press Enter to start.
To stop recording, click the Stop Recording button in the menu bar or press Command + Control + Esc. The recorded video will open in QuickTime Player, your Mac’s default media player. Click Play to review your recording file.
Recording your screen on a Mac using the QuickTime Player
Mac screen recording shortcut: Control + Command + N
Click File in the menu bar and choose New Screen Recording, or use the shortcut Control + ⌘ + N to bring up the onscreen controls. If you see the same onscreen controls as shown earlier, follow similar steps to record your Mac’s screen. The screen recording on a Mac is actually handled by the Screenshot app.
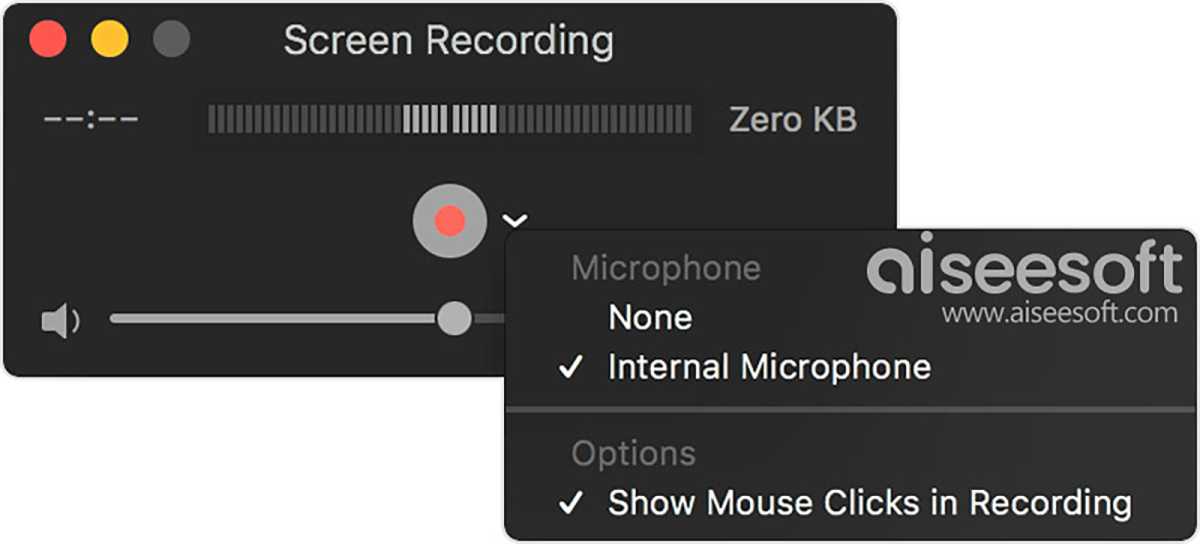
If your Mac is running a version earlier than Mojave (e.g., pre-2012 models), the Screen Recording window will look different. In this case, you will be using QuickTime Player instead.
Aiseesoft
Before starting the Mac screen recording, click the arrow next to the Record button. Adjust settings and then click the red Record button. To stop the recording, click the Stop button in the menu bar, or use the shortcut (Command + Control + Esc). The captured video will open in QuickTime Player, where you can play, edit, or share it as needed.
Where do screen recordings go on Mac?
Whether you use the Screenshot app or QuickTime Player to capture your Mac screen, the recording will be saved to your desktop by default. You will see a thumbnail of the recorded video in the top-right corner of your screen. To change the save location, click Options and select a different folder.
Third-party software for recording Mac screen with internal audio
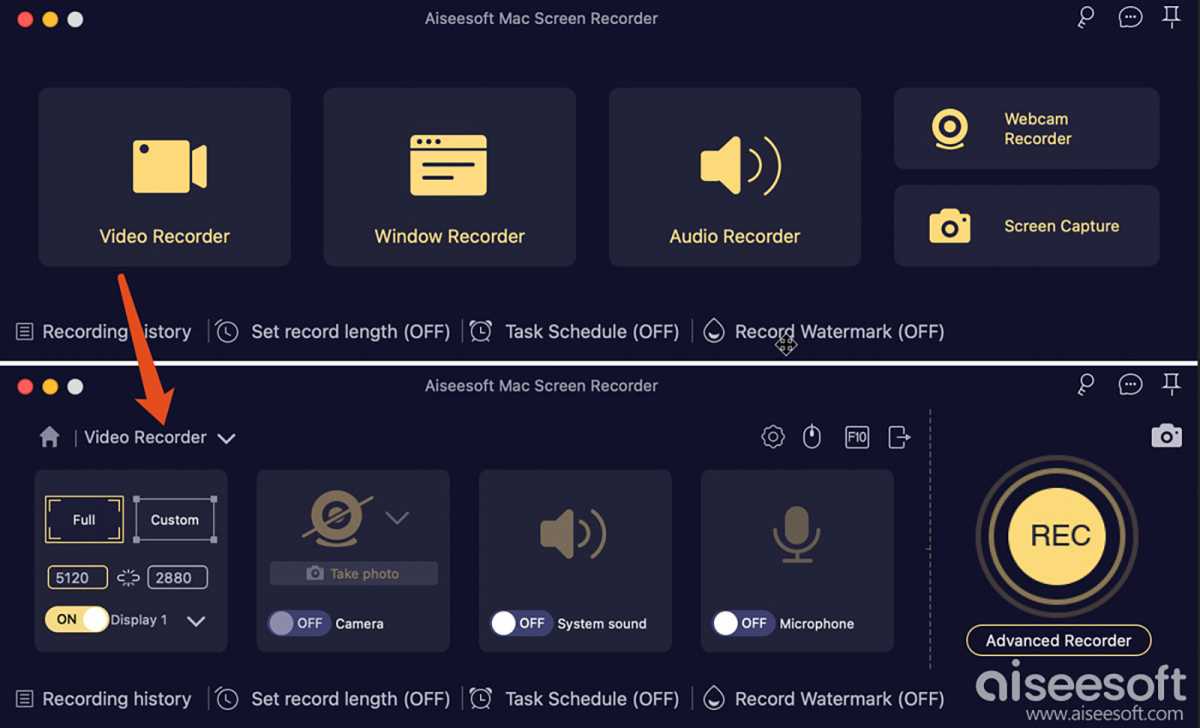
If you also need to record the system audio on your Mac, try well-regarded, user-friendly screen recorders like Aiseesoft Screen Recorder, Loom, OBS Studio, ScreenFlow, or Snagit. Compared with the above methods, these recorders are more professional in screen and audio recording.
Aiseesoft
Once you have chosen a screen recorder for Mac, launch the app and configure the image and audio settings. Similar to macOS’s native tools, these third-party apps are intuitive and easy to use. Typically, you will need to select the recording area (entire screen, active window, or a custom region) and the audio source (system audio, microphone, or both), and then start the screen capture.
How to edit screen recordings on a Mac
As mentioned, the screen recording file will be stored on your desktop. You can play it in QuickTime Player and make some basic edits. Simply go to the Edit menu, where you will find options like Cut, Rotate, Flip, Trim, Remove Audio, Remove Video, and more.
For adding transitions such as voiceovers or text, controlling playback speed, adjusting audio or adding background music, use iMovie.
If you are looking for more professional editing, software like Final Cut Pro, DaVinci Resolve, Adobe Premiere Pro, and ScreenFlow are excellent options. However, these can be complex for casual users, so it is worth trying their free or trial versions first to see if they meet your needs.
Conclusion
Screen recording on a Mac is fairly simple. For casual users, the built-in macOS tools are usually sufficient for basic tasks. However, if you record your Mac screen frequently and need more advanced functions, a dedicated screen recorder may be worth considering.


