Macro photography got a pretty big upgrade on the iPhone 16 Pro and Pro Max this year, with Apple upgrading the ultrawide sensor to a 48-megapixel lens. This is adding more details into your macro shot, which is really important, seeing as you are very close to the object when shooting in macro and thus blocking out some of the light. So, quadrupling the details is a big deal.
You can shoot macro photos and videos across the entire iPhone 16 lineup (that’s iPhone 16, iPhone 16 Plus, iPhone 16 Pro and iPhone 16 Pro Max), but it will look better on the Pro models, since the iPhone 16 and iPhone 16 Plus are still using the older 12-megapixel sensor. In this article, we’re going to aim to show you how you can take a macro shot or video with the iPhone 16.
How to shoot Macro Photos and Videos
To get started, open the Camera app on your iPhone 16, iPhone 16 Plus, iPhone 16 Pro or iPhone 16 Pro Max.
Next, move as close to the subject you want to take a macro photo or video or, until the Macro Control icon appears. This will appear as a flower icon in the corner.
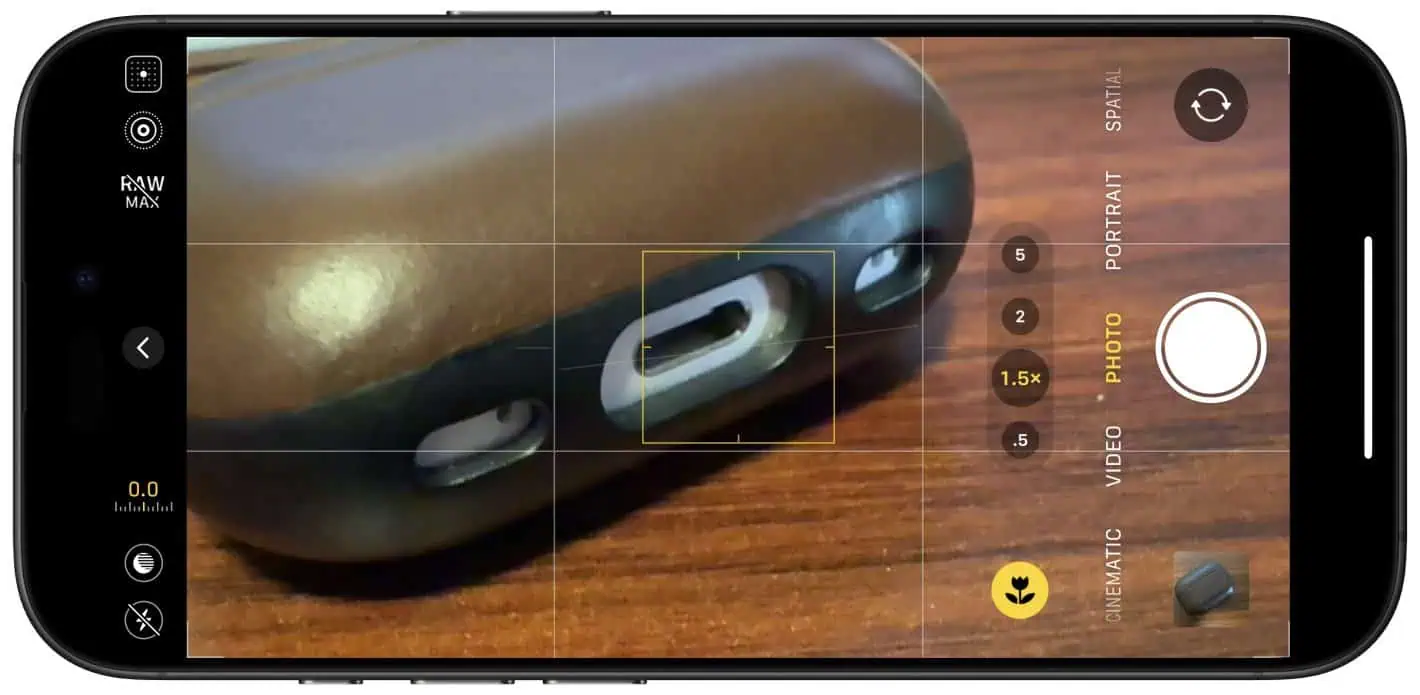
Move back and forth until the object is in focus correctly. For instance, if it is still blurry, move back a bit.
Once you’ve framed your picture properly, go ahead and snap your photo or press record.
Keep in mind that when using Macro, the iPhone is using the ultrawide camera sensor. You can also get as close as 2cm to your object. For those of us in the US, that’s less than an inch. Sometimes, it’s better not to use the macro option, which you can tap the Macro Control button in the corner to turn it off. But with this turned off, you will need to back up from the object to take a picture that is not blurry.
And that’s macro on the iPhone 16.


