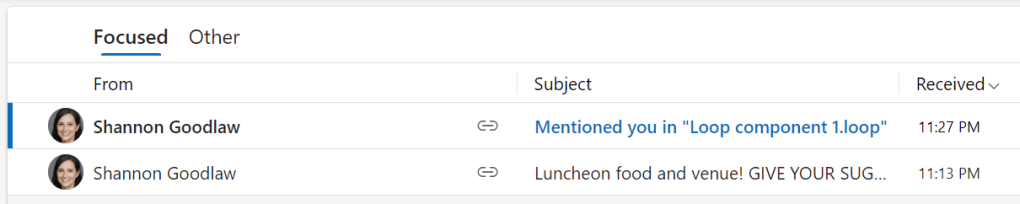
When you tag a co-worker in a component, they’ll receive a notification.
Howard Wen
Emoji picker: Obviously, this is for inserting an emoji somewhere in your component. Selecting this will pull up a panel filled with lots of emoji that you can scroll through.
Label: You can select from preset labels (such as Not started, In progress, Completed, etc.) to insert and optionally type in a few words of explanation. To create a set of custom labels, select Add label group, then type in a name for the new group along with the individual label options.
The label in a component can be changed later (e.g., from In progress to Completed) by clicking it and selecting another option from the Label panel.
Image: You can insert an image file that’s stored on your PC’s drive or in OneDrive.
As you become more familiar with these elements, you can skip scrolling through the list of elements by typing / followed by the first letter or two of the element you want. To insert an image, for example, type /i and select Image.
A Loop component with multiple elements.
Howard Wen
Note that many of these elements can be combined. For example, you can insert a date, emoji, image, or person element inside a table cell. And some elements can be inserted alongside one another, sharing the same line. Go ahead and play around to see which combinations work.
As you add several elements, you can move any of them to a higher or lower spot within the component. Click to select the element, then click-and-hold the six-dot icon to the left of the element. Drag this icon up or down, and then let go where you want the element to be moved.
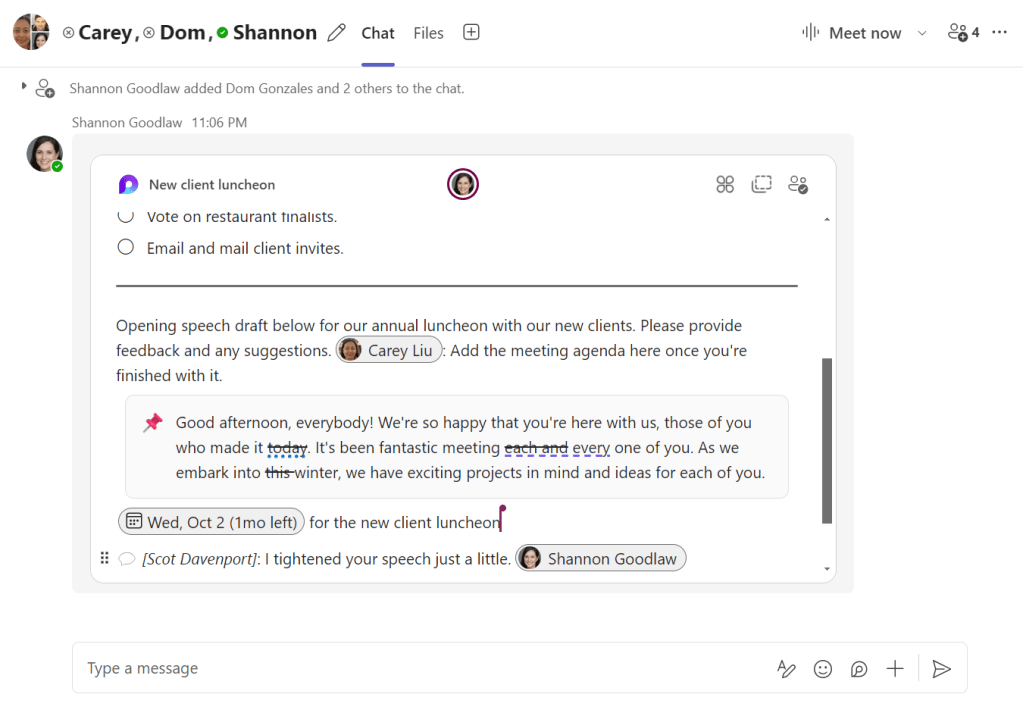
Sharing your Loop component
Once you’ve assembled your Loop component, you’re almost ready to send it to your co-workers for collaboration. But first, think about who you want to share it with.
Changing your Loop component’s share settings
By default, Loop components are accessible (and editable) by anyone in your organization, but you can change that.
In Outlook: Along the upper left of your Loop component, click your Loop component’s name. (It’ll either be derived from the subject line of your new email or named “Loop component [number]”) On the small panel that opens, select People in [your organization] with this link can edit.
In Teams: Along the top of your Loop component, click People in your organization with the link can edit.
The “Link settings” panel opens.
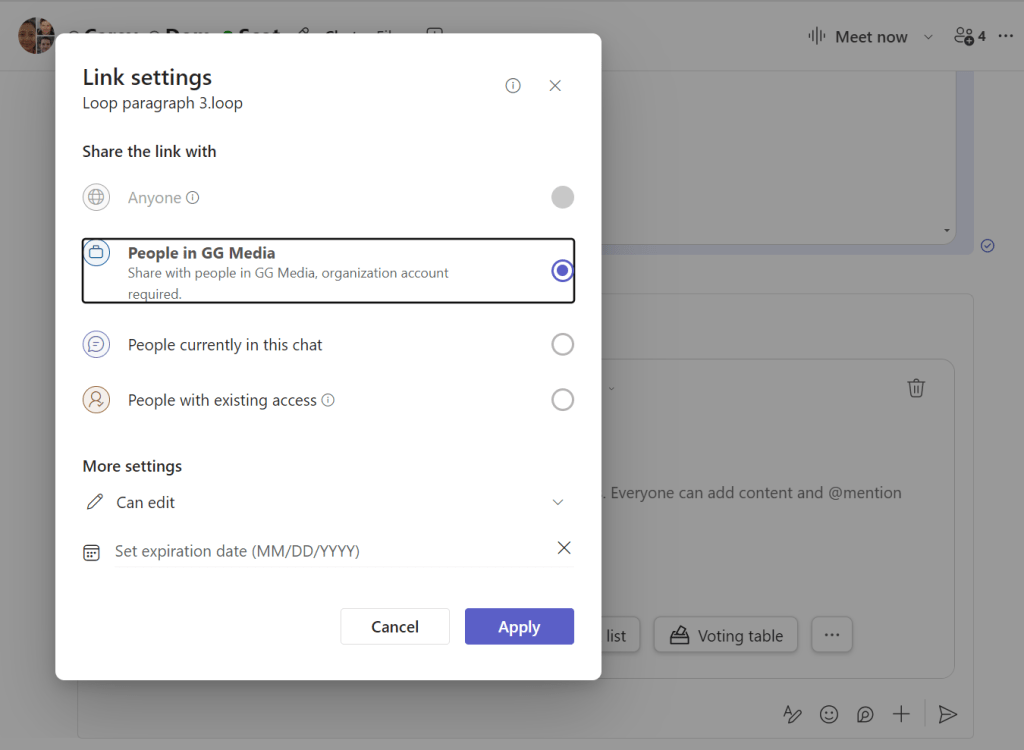
Changing a component’s sharing settings in Teams.
Howard Wen
Below “Share the link with,” you can select:
- Anyone
- People in [your organization]
- Recipients of this message (if the component is in an Outlook email)
- People currently in this chat (if the component is in a Teams chat)
- Only [channel name] (if the component is in a Teams channel)
- People with existing access
Note: Your organization may have disabled one or more of these options and/or set up different default sharing permissions.
If you’d prefer that other people you share with not be able to make changes to your Loop component, below “More settings,” click Can edit and change it to Can view.
Additionally, you can set an expiration date. On this date, the component will no longer be viewable by the people you’ve shared it with. (This feature is currently available only in Teams.)
In OneNote, Whiteboard, and Word: Components embedded in these three apps use the same share settings that you set up for the entire notebook, whiteboard, or document.
To share a OneNote notebook or Word doc, click the Share button at the upper right of the page. Select Manage Access and on the panel that opens, select Start sharing. In Whiteboard, simply click the Share button at the upper right of the page.
On the panel that opens for any of these apps, type in the names, groups, or emails for people that you want to share the notebook, whiteboard, or document with. To change access permissions, click the Can edit (pencil) icon and change it to Can view.
Sending your Loop component
After you’ve finished setting up your Loop component and its access permissions, you’re ready to share it with your co-workers.
In Outlook: Fill out any other areas in the email body before or after your Loop component. When you’re finished composing your email, click the Send button.
In Teams: Click the arrow button at the lower right. Your Loop component will be inserted into your Teams conversation.
In OneNote, Whiteboard, and Word: Once you’ve shared the notebook, whiteboard, or document as described above, your co-workers will get a notification through email.
Resharing your Loop component in other M365 apps
You can copy your Loop component and embed it into other Microsoft 365 apps. Click the Copy component icon (two overlapping rectangles) at the component’s upper right. This will copy a link to it to your PC clipboard.
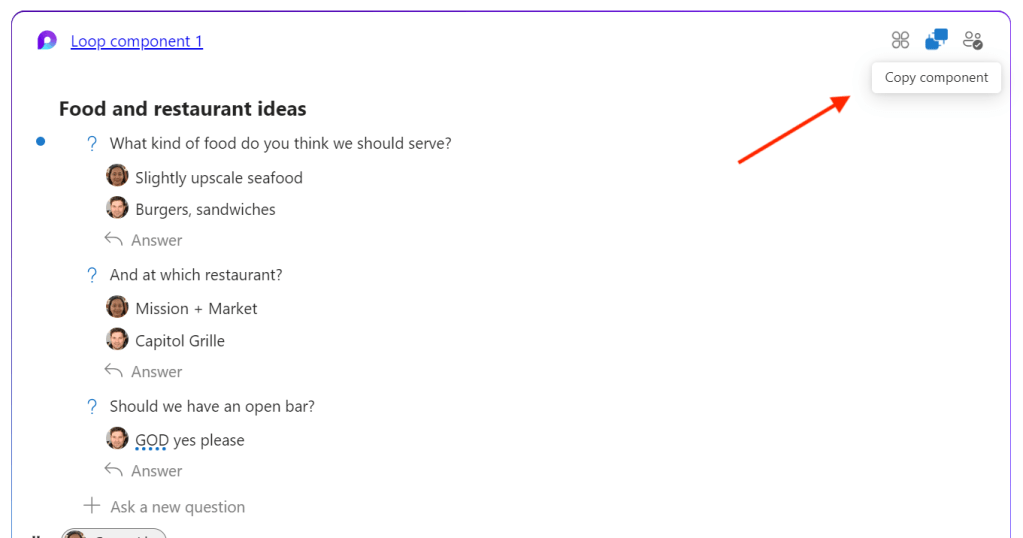
Click the Copy component icon to copy a link to it.
Howard Wen
Here’s what happens when you paste this link in another app or location:
- When you paste this link inside a Microsoft 365 app that supports Loop, your Loop component will appear inside that app. So if you create a Loop component in a Teams chat, you can paste it inside a different Teams chat or channel, into a new Outlook email, or into a page in OneNote, Whiteboard, or Word. Your co-workers will be able to contribute to your Loop component in the other app or location.
- When you paste the link into an app that doesn’t support Loop, a link to open the component in a browser will appear. Your co-workers will still be able to collaborate on the component, but not directly in the app where you pasted the link.
Interacting with a Loop component
The entire point of a Loop component is for you and your co-workers to collaborate on it. If multiple collaborators are looking at the component at the same time, everyone can see changes happen in real time and who’s making the changes. If someone looks at the component later, they’ll see all changes made earlier.
To change items in a Loop component: Click on the text or other element (date, image, table, etc.) you want to change and make your change.
To add an element to a Loop component: Click the space toward the bottom of the Loop component. The words “Just start typing…” appear. You can type in text or press the / key to see the same list of options covered under “Adding other elements to your Loop component” above.
To add a comment to an element: You and your co-workers can add comments to most elements. Click the element to select it, then click the icon of two speech balloons at the lower left of it. On the panel that opens, click Comment and on the card that opens, type a brief comment and optionally select an emoji.
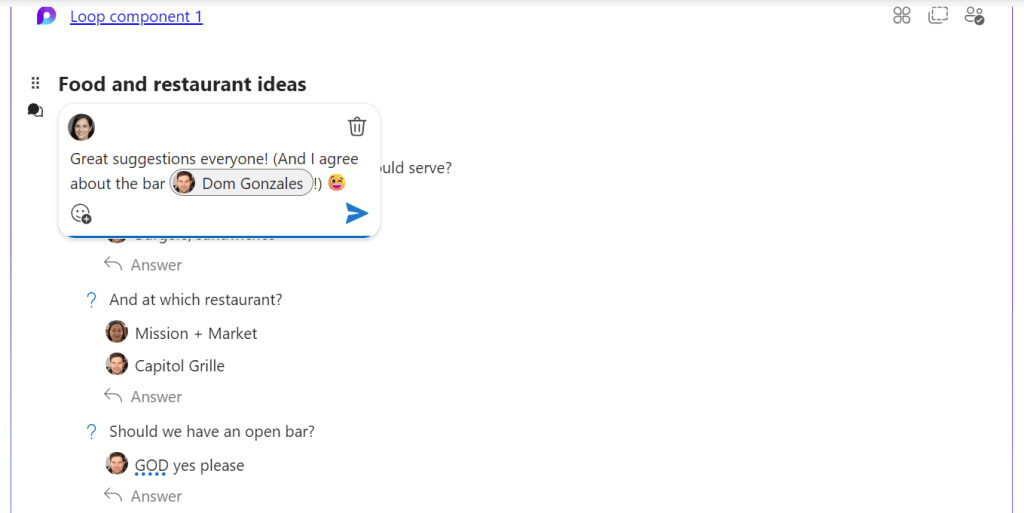
You and your collaborators can add comments to most elements in a Loop component.
Howard Wen
You can access these additional functions along the top of the Loop component:
To view a Loop component inside a browser: At the upper left of your Loop component, click its name. Your Loop component will open in the Loop app in a new tab in your browser. You can make changes to the Loop component in this browser tab.
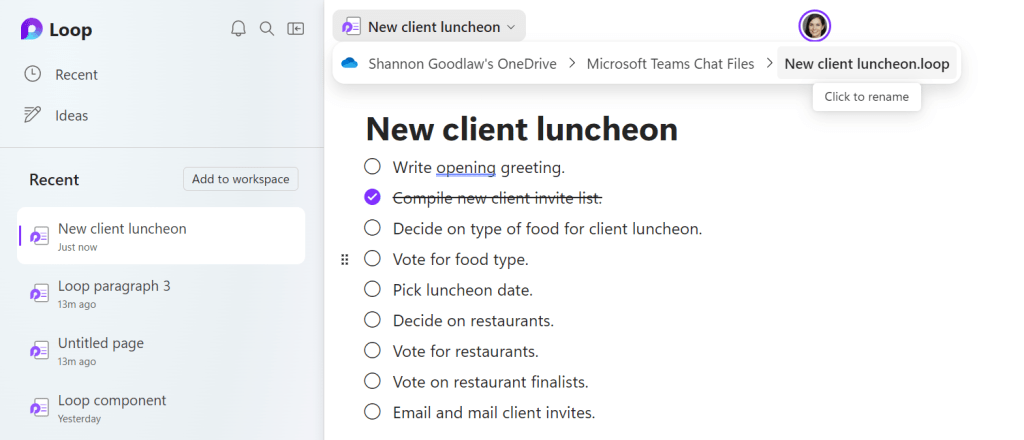
It’s easy to rename a component in the Loop app.
Howard Wen
To rename the component, click its name in the title bar at the top of the page. This opens a bar that lists the file location of this component — click the name of the component at the end of this bar to rename the component.
To see where a Loop component is being shared: Click the cloverleaf (“Shared locations”) icon at the upper right of the component to see the apps that your Loop component is being shared in.
To add a Loop component to a Loop workspace: Click the cloverleaf (“Shared locations”) icon at the upper right of the component. On the panel that appears, select Add to Loop workspace and select a workspace to add it to.
To copy (a link to) a Loop component: As noted above, you can embed a Loop component you’ve created in various Microsoft 365 apps. You can also embed a component created by someone else who granted you permission to edit it. Click the dual-rectangle icon to copy a link to it to your PC clipboard, then paste it into another app. (See “Resharing your Loop component in other Microsoft 365 apps” above for details about how this works.)
To see who has access to a Loop component: Click the dual silhouette icon.
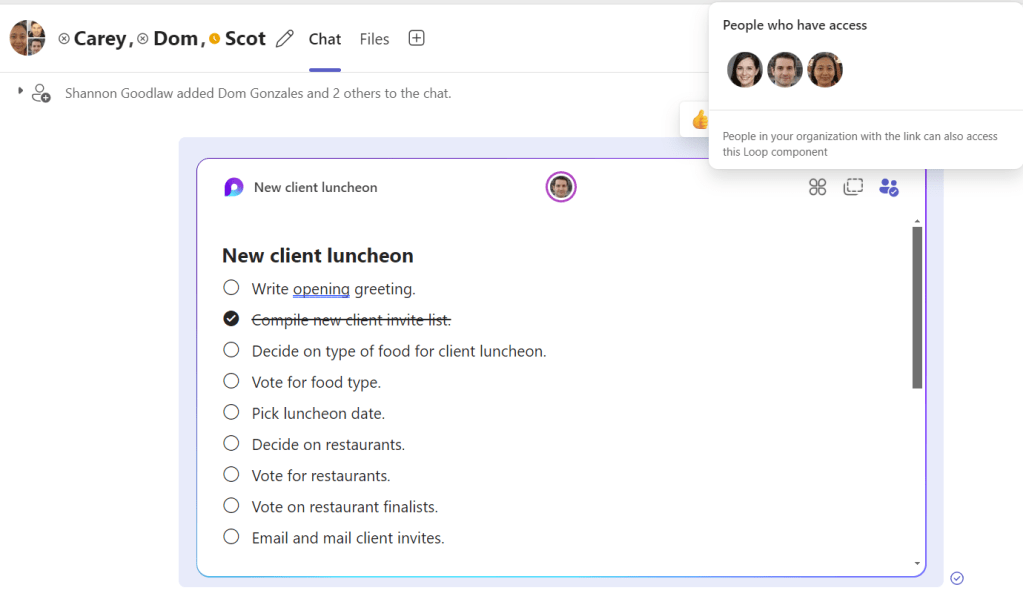
You can quickly see who has access to a Loop component.
Howard Wen
To change the sharing status of a Loop component (in Teams): Move the pointer over your Loop component and click the pencil icon that appears at the upper right of it. Then along the top of your Loop component, click People in your organization with the link…, then follow the instructions above under “Changing your Loop component’s share settings.”
To delete a Loop component: Move the pointer over the Loop component until a toolbar with emojis appears at the upper right of it. Click the three-dot icon, and on the menu that opens, select Delete.
Note: If you created the Loop component, you can delete it. If you reshare a Loop component that someone else created, you can only delete it from the app that you reshared it on.
To pin a Loop component in Teams: Move the pointer over the Loop component until the toolbar with emojis appears at the upper right. Click the three-dot icon, and on the menu that opens, select Pin.
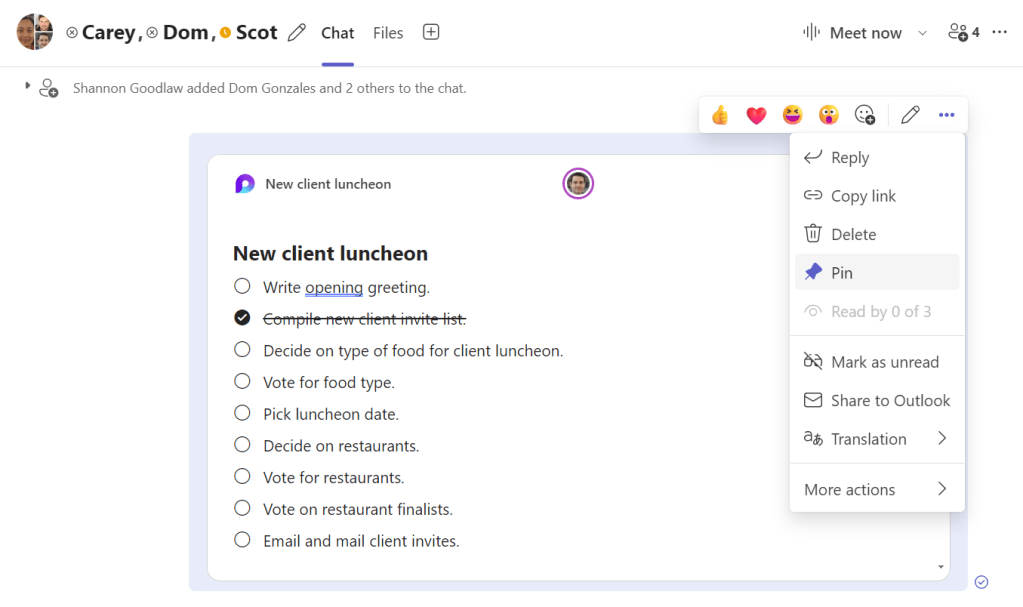
Pinning a Loop component in a Teams chat.
Howard Wen
If you’re in a Teams chat, this will place a horizontal bar with the name of your Loop component along the top of the chat window. Now, no matter how far down the stream of messages or chats has progressed, clicking this bar will jump your view back up to your Loop component.
Pinning a component in a Teams channel is less useful. Instead of pinning a shortcut to the component at the top of the page, it simply places a pushpin icon on the component. It is easier to see that way, but you still have to scroll through the list of posts.
Managing your Loop components
Most of the Loop components you’ve created from within a Microsoft 365 app are stored in your OneDrive and count toward whatever storage limit comes with your Microsoft 365 plan. You’ll find them under “My files” in different folders depending on the app you created them in:
- Components created in OneNote are in the OneNote Loop Files folder.
- Components created in Outlook are in the Attachments folder.
- Components created in Teams chats are in the Microsoft Teams Chat Files folder.
- Components created in Whiteboard are stored in the Whiteboards > Components subfolder.
- Components created in Word are stored in the Word Loop Files folder.
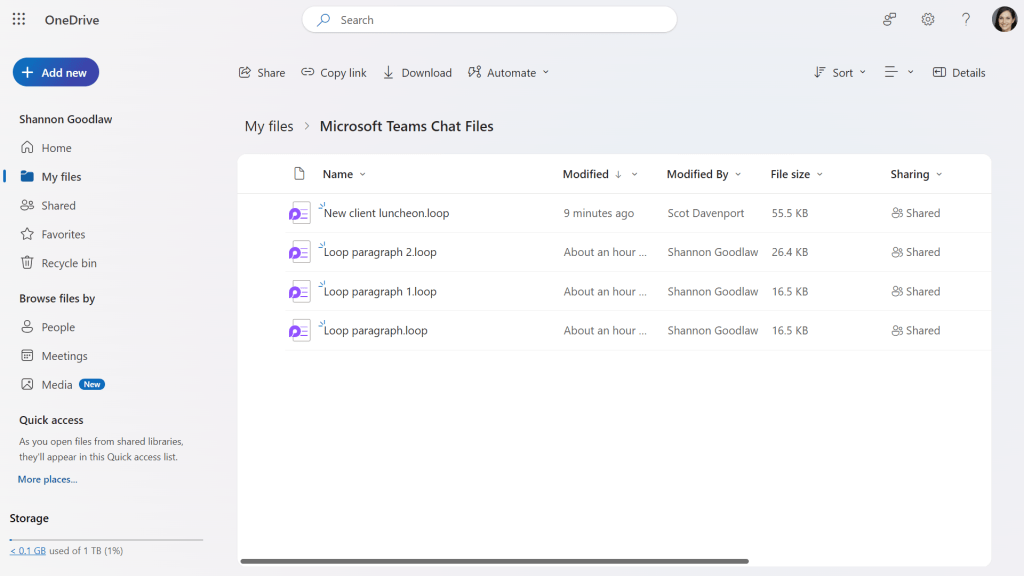
Loop components that you create in M365 apps are stored in your OneDrive.
Howard Wen
(Loop components you create in a Teams channel are not stored in your own OneDrive, but in the SharePoint site for the team that houses the channel, under Documents > [channel name].)
In OneDrive, you can manage your Loop components as you would any other file: right-click a component’s file name to see a menu that lets you copy, delete, or rename it; manage its access settings; and more.
This story was originally published in April 2023 and updated in September 2024.
Related reading


