With the shift to ‘Apple Account’ in iOS 18, users may notice slight adjustments to the account creation process, including integrated verification options, alongside the rebranding.
While existing logins remain intact, the change might require a brief familiarisation, especially for those accustomed to the previous Apple ID system.
Whether you’re a new Apple user navigating this change or an existing one needing a refresher, this guide will walk you through setting up a new Apple Account.
Read Also: How to cancel or change your iCloud storage plan on your iPhone and Mac
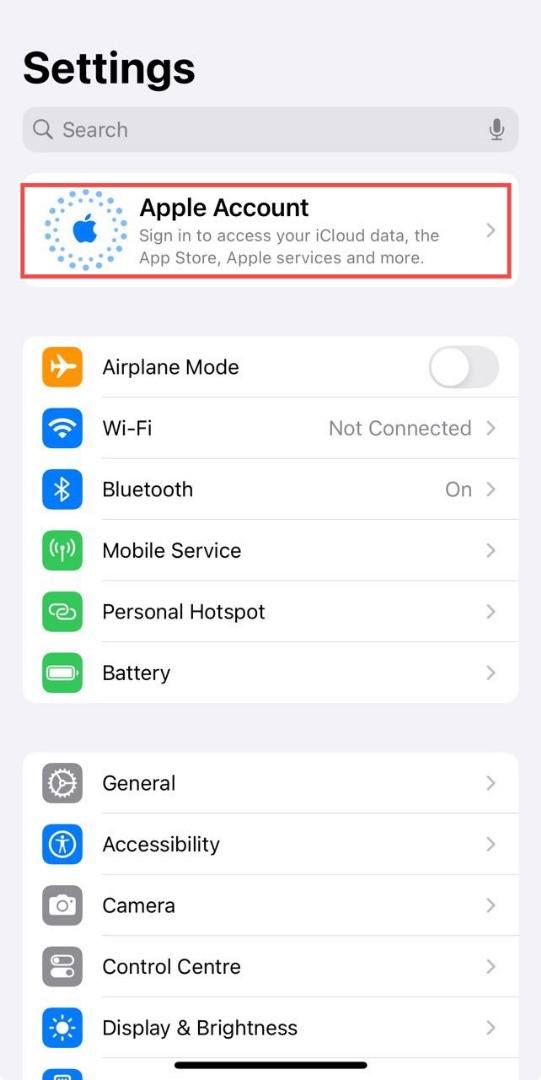
Step 1 – Access the sign-in page
The process of creating an Apple account is similar across devices, but the initial steps vary depending on your device. Here’s how to access the sign-in page:
- iPhone and iPad users: After setting up your device, tap ‘Forgot Password’ or ‘Don’t Have an Account?’ to reach the sign-in page. Alternatively, open the App Store, tap ‘My Account’, and select ‘Create New Apple Account’.
- Mac users: Go to the Apple Menu, choose ‘System Settings’, click ‘Sign-in’ in the sidebar, and select ‘Don’t Have an Account?’.
- Windows PC users: Open the Apple TV, Apple Music apps, or iTunes for Windows. Click ‘Sign-in’, then select ‘Create New Apple Account.’
- Web users: Visit www.account.apple.com and click ‘Create Your Apple Account.’
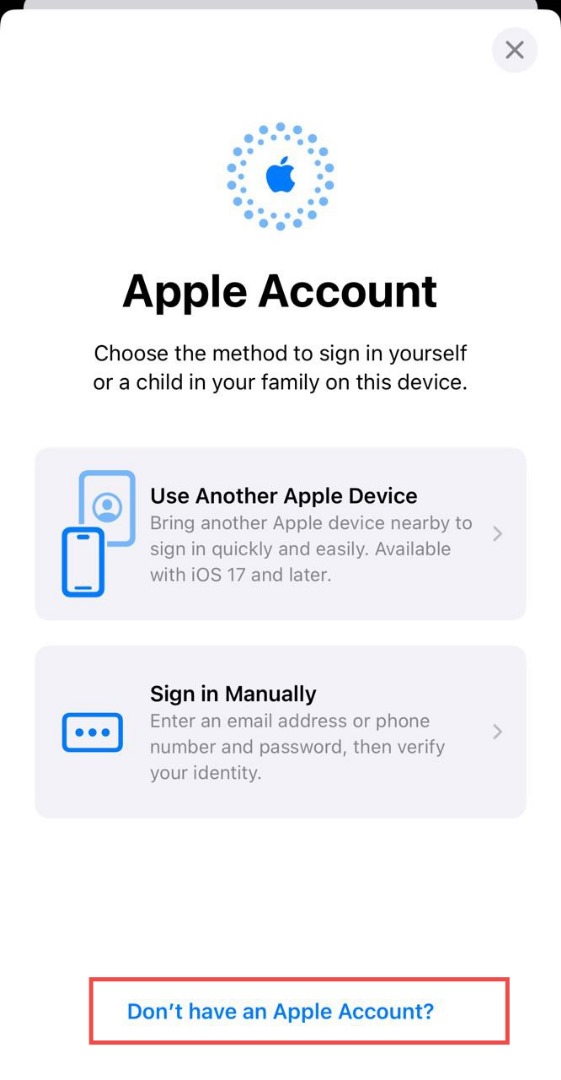
Step 2: Create a new account
Once you are on the sign-in page, click ‘Don’t have an Apple Account”.
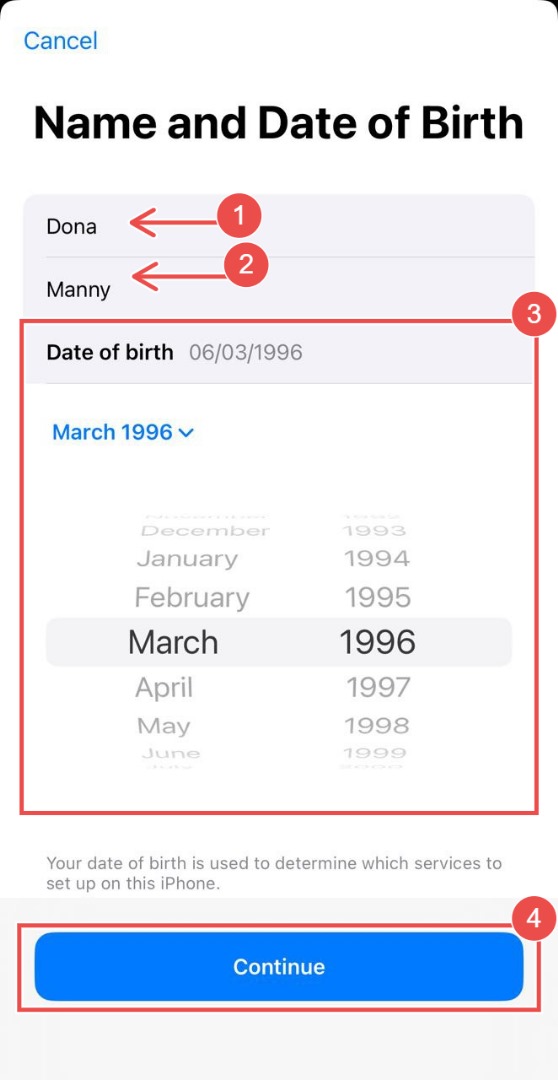
Step 3: Provide accurate information
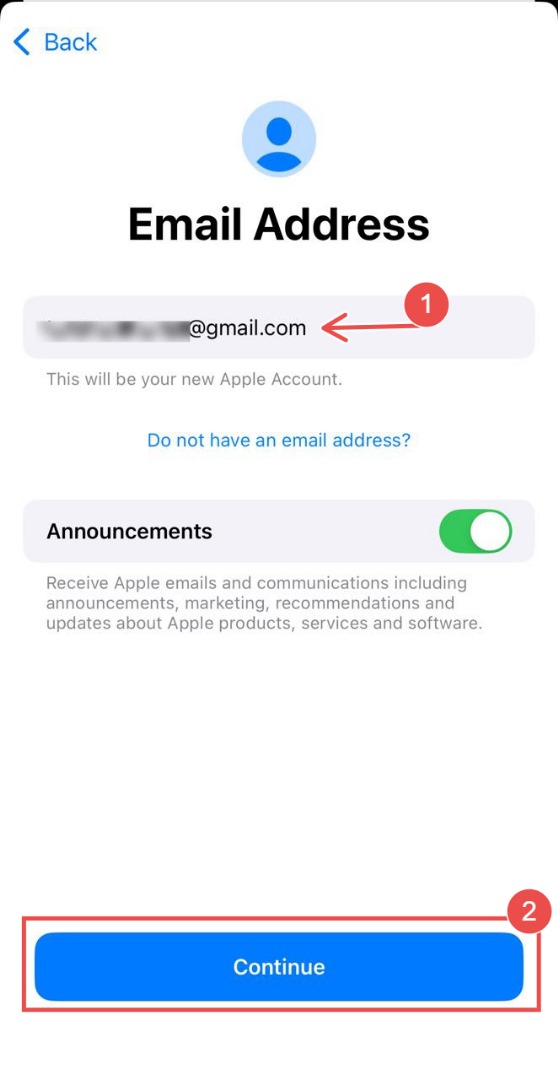
Once you’ve accessed the sign-in page, follow the on-screen prompts to enter the following details:
- Your name and date of birth.
- A valid email address.
- A strong password.
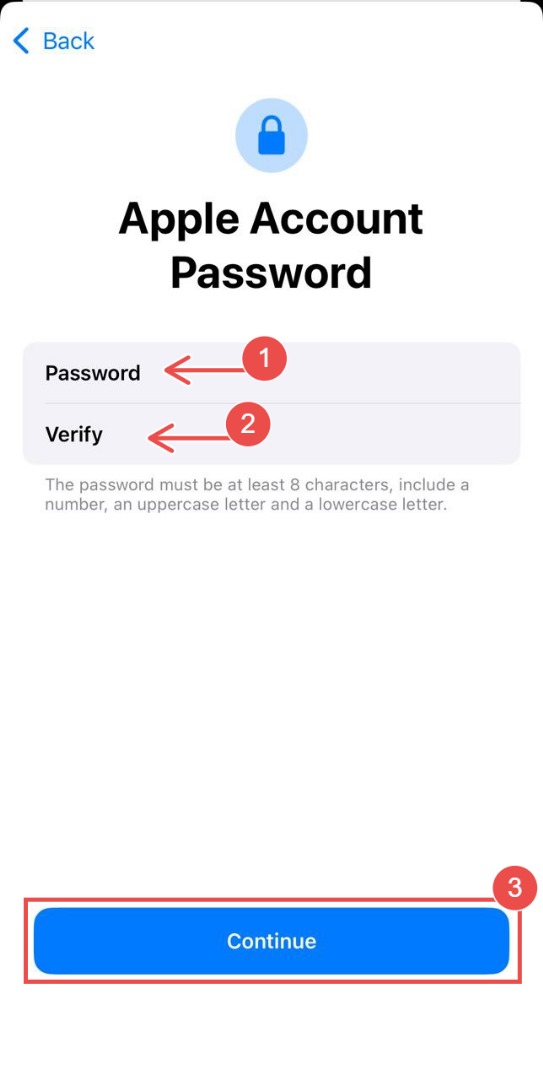
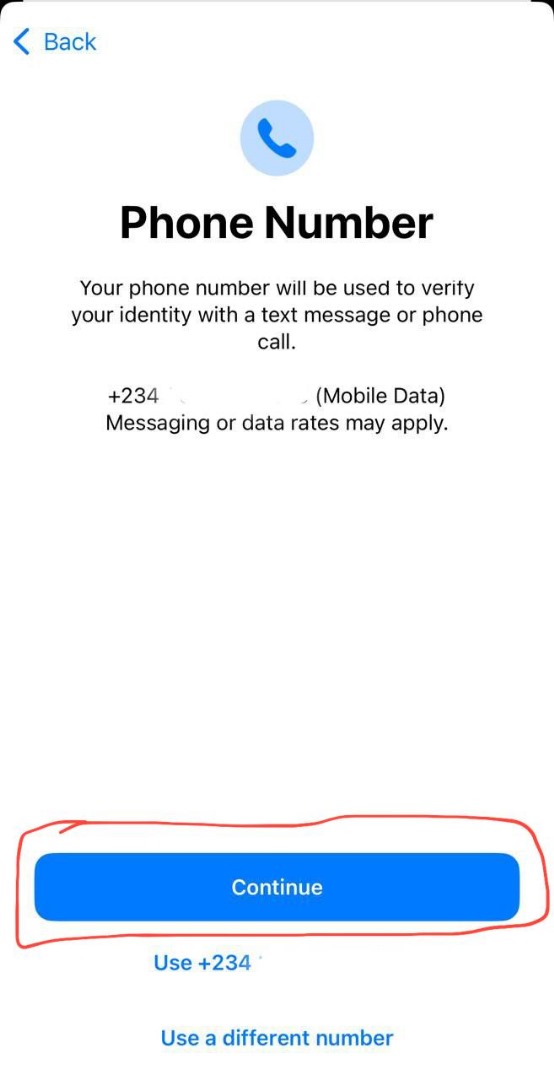
Step 4: Verify your number
Apple will send a code to your phone for authentication. You can also choose to use an alternative phone number at this stage.
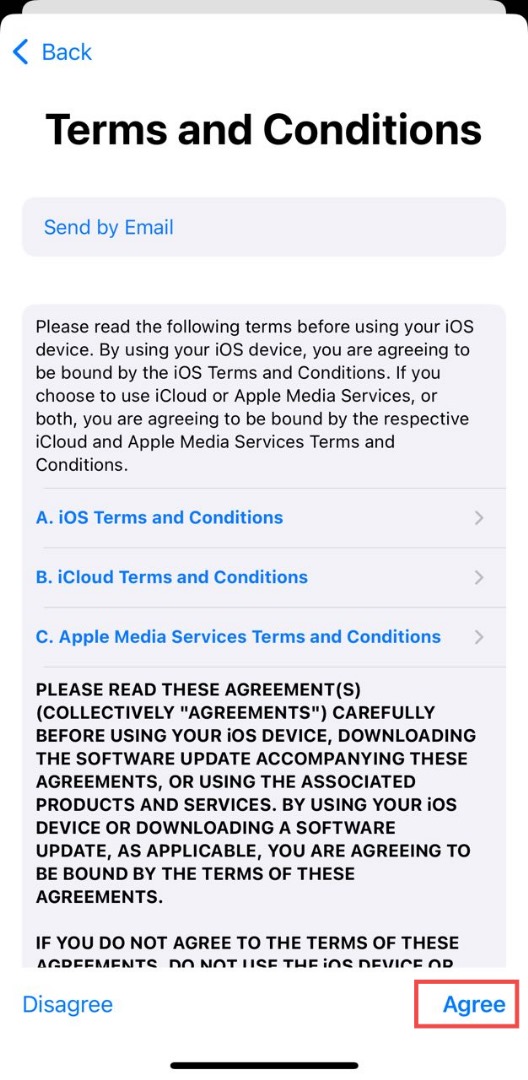
Step 5: Glance and agree to the Terms (We know you won’t read them)
Apple will present you with the (lengthy) terms and conditions. While we recommend reading them, just click ‘Agree’ and you are another step closer to creating your Apple account.
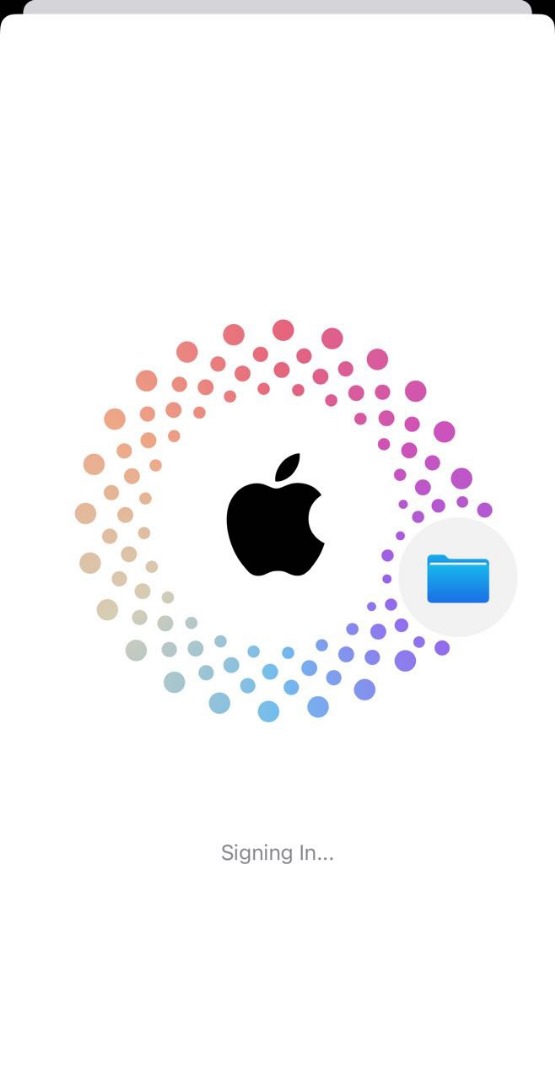
Upon completing this step, you’ll see a ‘Signing In’ screen, as shown below:
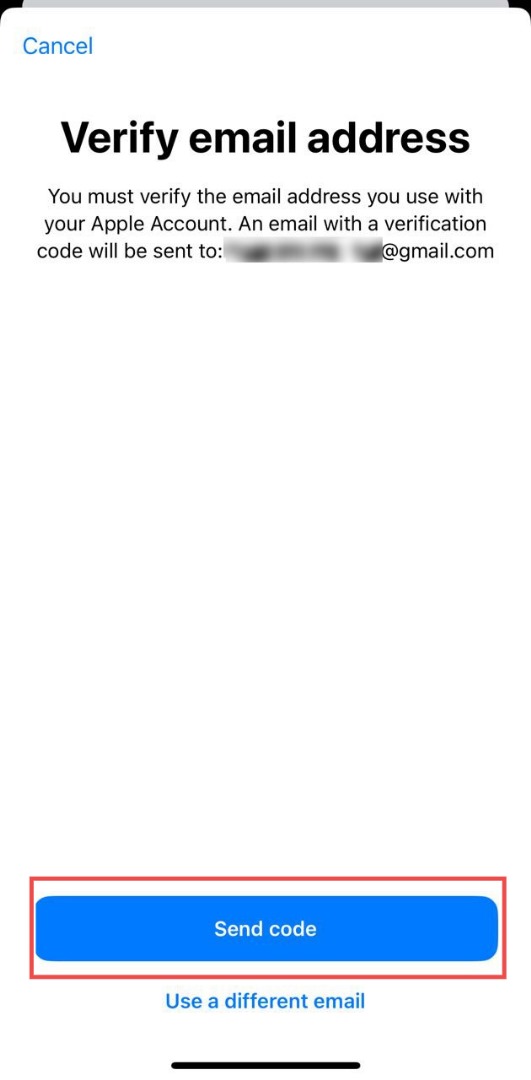
Step 6: Verify your email address
Don’t skip this step! Confirming your email address ensures you can recover your account if needed.
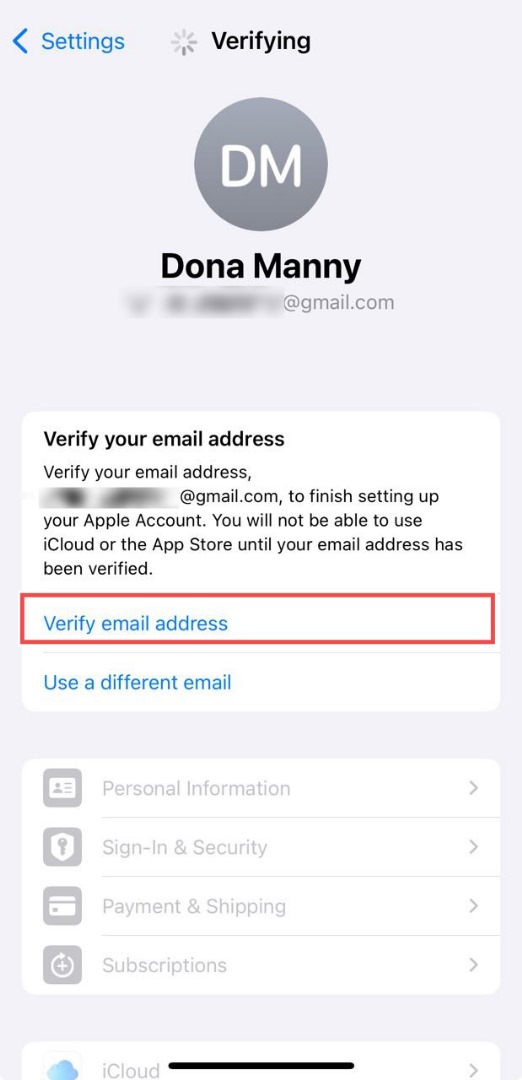
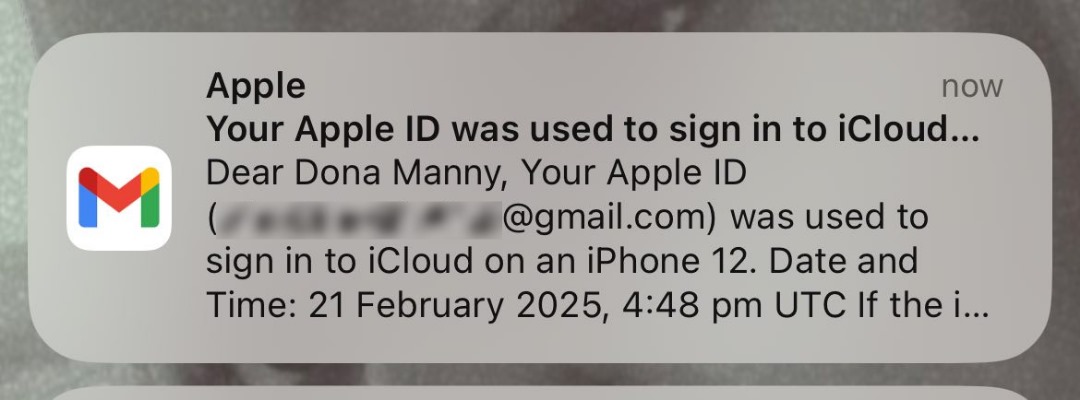
Once you click ‘Verify email address’, you’ll receive a notification like this ▶️
Check your inbox for a verification email from Apple and confirm your email address.
Step 7: Set up two-factor authentication
This step is crucial but often overlooked. Two-factor authentication adds an extra layer of security to your Apple ID. Enable 2FA during account setup or go to Settings > [Your Name] > Password & Security > Two-Factor Authentication.

Click on ‘Two-Factor Authentication’
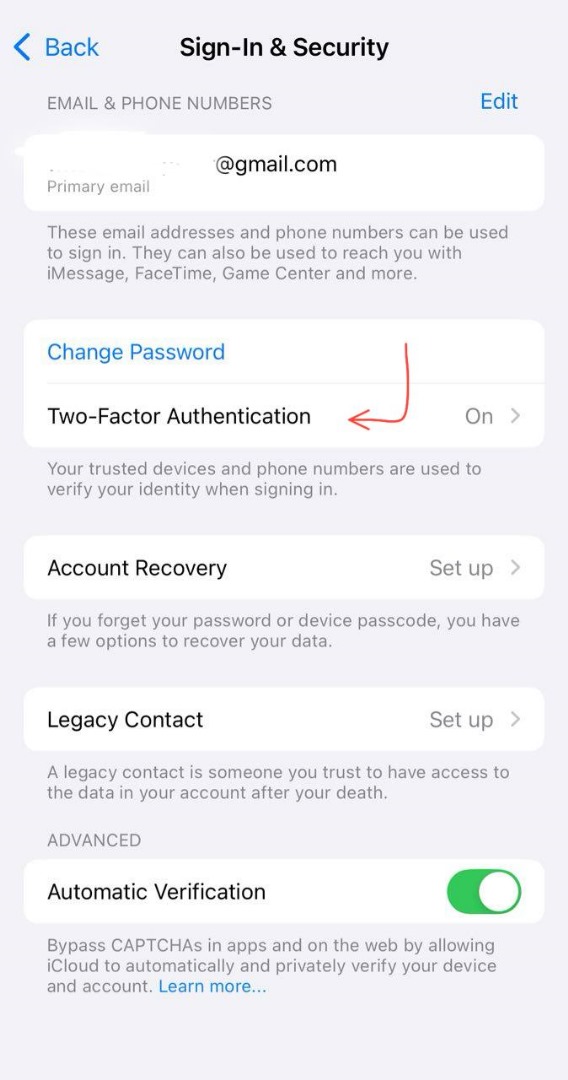
After enabling it, tap ‘Next’ to proceed.
That’s it! Your new Apple account is ready to use. However, avoid these common mistakes to ensure a smooth experience:
5 common but costly mistakes to avoid when creating a new Apple account
Creating an Apple ID is straightforward, but small mistakes can lead to significant problems later. Below are five common pitfalls and how to avoid them.
Mistake 1: Using a weak password
A weak password is easy to guess or hack. For example, passwords like “123456” or your birthdate are not secure. If someone guesses your password, they can access your account, make purchases, or even lock you out.
Use a strong password with at least 12 characters, include a mix of uppercase and lowercase letters, numbers, and symbols (e.g., `Apple@2023!`), avoid using personal information such as your name, birthdate, or common words, and consider using a password manager to create and store strong passwords.
Tip: Think of a memorable phrase, like `MycheetahIs13Red!`, and use it as your password.
Mistake 2: Using an email address you might lose
Your email address is key for account recovery and communication with Apple. If you use a work or school email, you might lose access to it later. If you lose access to your email, you won’t be able to reset your password or recover your account.
Use a personal email address that you control (e.g., Gmail or Outlook), if you’ve already used a work or school email, update it by going to Settings > [Your Name] > Name, Phone Numbers, Email > Edit. Ensure your email address is active and check it regularly.
Tip: Create a dedicated email address just for your Apple ID to keep things organised.
Mistake 3: Providing incorrect personal information
Apple requires accurate details, such as your name, date of birth, and payment information, to verify your account and process payments. Incorrect information can lead to issues with purchases, subscriptions, or account recovery.
Double-check all details before submitting them, use your legal name and correct date of birth and ensure your payment information is accurate and up to date.
Tip: If you’re creating an account for a child, use their real date of birth to enable appropriate parental controls.
Mistake 4: Skipping Two-Factor Authentication (2FA)
Two-factor authentication adds an extra layer of security by sending a verification code to your phone when you sign in from a new device. Without 2FA, your account is more vulnerable to hacking. Use a phone number you always have access to for receiving verification codes.
Tip: If you lose access to your phone, ensure you have a backup method, such as a secondary phone number, to receive verification codes.
Mistake 5: Sharing your Apple ID
Your Apple ID is like a key to your personal information. Sharing it with others can lead to complications like mixed data, unauthorised purchases, or even compromise your account’s security.
Use Family Sharing to share purchases and subscriptions without sharing your Apple ID, create separate Apple IDs for each person and never share your password or verification codes.
Tip: If you’ve already shared your Apple ID, change your password immediately and review your account for any unusual activity.
Avoiding these mistakes will help keep your Apple account secure and easy to use.
Now that you know what to do (and what to avoid), you can start making the most of your Apple device!


